- Introduction
- Technical Stack
- Processing the uploaded image client side, sending it to API
- Server-side: Handling the request with API Gateway and sending to Python Lambda function
- Decompressing and parsing the request inside the Python Lambda function
- Detecting the individual photos with Python OpenCV
Introduction
The purpose of AutoCropper is to automatically split individual scans that contain multiple individual photos (separated by whitespace from the scanner bed) into separate cropped image files.
Technical Stack
- React and Next.js for frontend development
- AWS API Gateway for handling requests and auth
- Serverless Python AWS Lambda function for backend image processing
- Node.js and Express for Stripe integration
- GraphQL and AWS Auth for registered accounts
- AWS Amplify to tie everything together
Processing the uploaded image client side, sending it to API
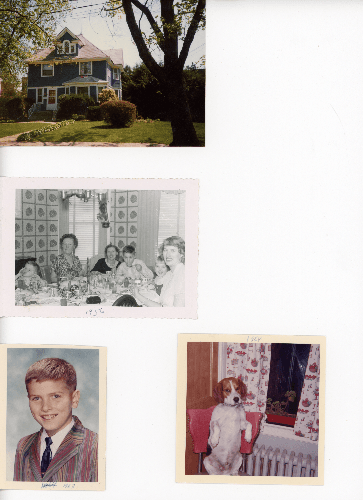
When an image is uploaded, the first order of business is storing the full size image locally in your browser. It will not be needed until you click "Export", then it is loaded again and the crop coordinates are scaled up to match the massive dimensions of the original photo. Here is an example upload that is 13.8 MB. This scan features a house, my grandma with some friends, my dad as a kid, and his dog Blaze.
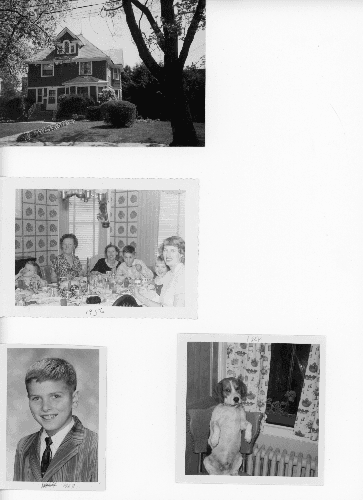
The upload is then compressed down to a height of 500px (assuming the height is greater than 500px which I would hope to be the case). This brings the original 13.8 MB file down to around 200 KB. The coloring data is stripped and the image made grayscale. This is what is sent to the server for processing (and not saved or stored anywhere, please read my exhaustive privacy page):
This image is further compressed into a zip file binary, and attached to a FormData object that will make up the body of the request.
The request is then sent as a POST request via Axios and ~250 kb in size.
Server-side: Handling the request with API Gateway and sending to Python Lambda function
AWS API Gateway is the request's first order of business in its journey. API Gateway decides what to do with the request. In my case, I set it to "ANY" so that every type of request (GET, POST, etc.) is routed to my serverless Python Lambda function. I use API Gateway in order to authenticate Pro user requests.
Here is the setup in API Gateway:
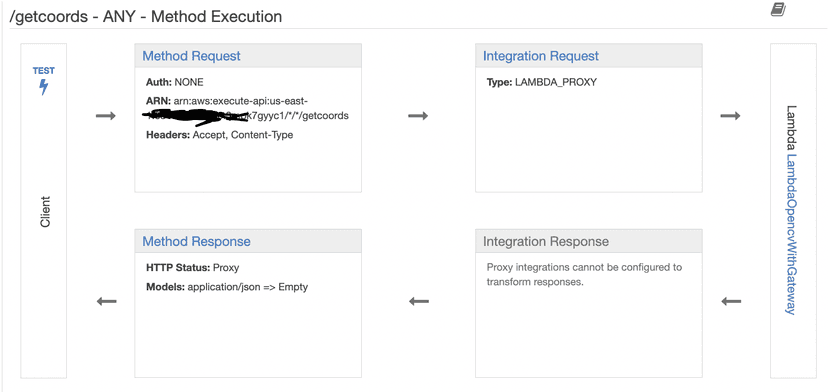
API Gateway then sends the request contents (the compressed zip binary containing the compressed image) to my serverless Lambda function, "LambdaOpencvWithGateway", running Python 3.7 with a custom OpenCV layer. You can see that the Method Execution has its Integration Request configured to specify the target backend that should be called, which is the Lambda function. Here is the Integration Request set up:
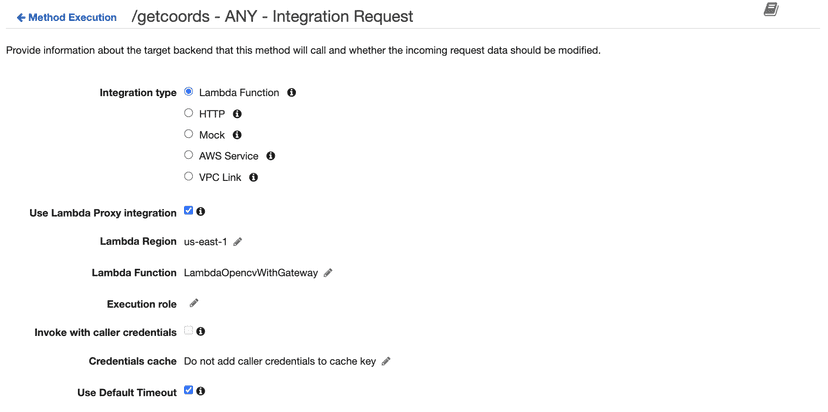
With the request body now sent to the Lambda function, we can begin to carefully unpack the contents in order to finally be able to process the compressed image with OpenCV.
Decompressing and parsing the request inside the Python Lambda function
This was honestly a huge pain because there were so many different levels of compression that have to be unpacked in a precise order.
First we extract the request body's boundary, which is unique for each request and separates the contents of the FormData:
c_type, c_data = parse_header(event['headers']['content-type'])Then we decode the entire request body because API Gateway automatically encodes the contents in base64:
decoded_string = base64.b64decode(event['body'])The decoded body is still a bytes object, so we must cast the event boundary to a bytes object:
c_data['boundary'] = bytes(c_data['boundary'], "utf-8")We then parse the form data using the boundary and we have the compressed zip file that contains the compressed image:
form_data = parse_multipart(BytesIO(decoded_string), c_data)imageZip = form_data['zipFile'][0]The zip file must then be converted to a bytes object so we can decompress it using Python's built in ZipFile function, and most importantly, read the image using openCV:
zip_file = BytesIO(imageZip)with zipfile.ZipFile(zip_file, 'r') as zip_ref:image_file = zip_ref.open(zip_ref.namelist()[0])image = cv2.imdecode(np.frombuffer(image_file.read(), np.uint8), cv2.IMREAD_UNCHANGED)
After all that work, we are ready to use Python OpenCV to process the image! If you're still with me, that's impressive.
Detecting the individual photos with Python OpenCV
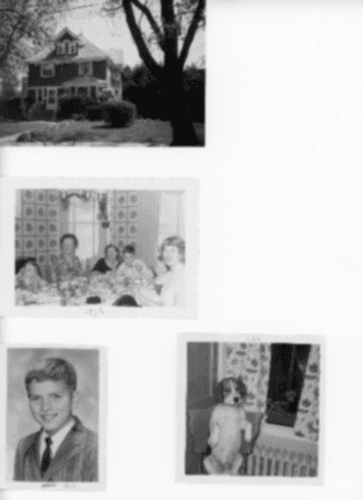
Now we finally have the image in the correct format inside our Python function. For humans, it's obvious there are 4 images within this image. We need to make it easier for a computer to "see" the individual, separate images separated by whitespace.
1. We start with the original, grayscale image

2. Gaussian Blurring
You can read about Gaussian blurring at this Wikipedia link. Here is our blurred input. Blurring will help us in our thresholding in the next step:
3. Image Thresholding
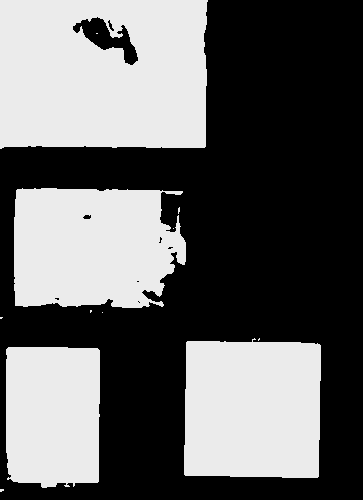
What is thresholding? In simple terms, we take a look at each pixel, and decide whether to make it a white pixel if the pixel intensity is greater than the threshold, or black if the pixel intensity is less than the threshold. You can read more about how image thresholding works on Wikipedia.
Here is our thresholded example. Pretty wild looking:
4. Finding the Contours
Contours are basically the outline, or the edges of any shapes within an image. Simple as that. Learn more about computer vision and how computers see objects on Wikipedia.
We use the findContours method to detect the edges of everything on the image. Luckily, we processed the image enough so we won't have infinite contours. That is why the above black and white filled thresholded image is so important.
Here are the detected contours of the thresholded image, placed against the original image. Pretty cool:
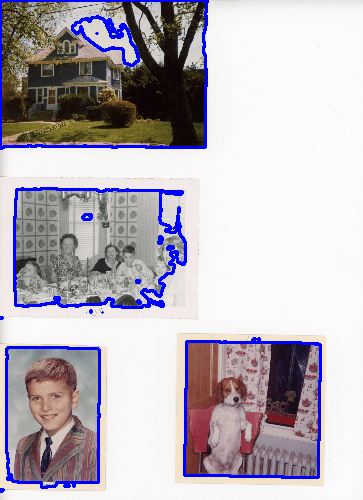
There are 21 different contours in this example (the majority of them are tiny, and the blue outlines are thick so they appear as blue dots). We only want 4 of these contours. You can take a look and see which ones we want, the ones that surround each individual image, but how can we isolate them? We must iterate through each contour, and create some sort of check condition to decide if it is the contour of an individual image.
5. Filtering the Contours
We will filter based on the size area of the contours. We need to set an upper and lower limit.
For the lower limit, let's only take the contours whose area is greater than 5% of the total image size. For the upper limit, let's only take the contours that are less than 66% the size of the total canvas.
We are left with 4 contours:
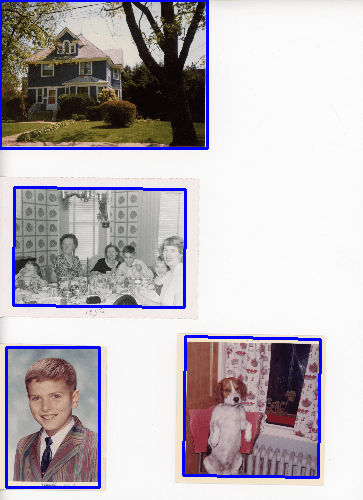
Isn't that awesome? From here, we could try to get fancy and perfect the crops, which I have tried before. It works great for many scans, but it is too precise and sometimes can over-crop. I think erring on the side of under-cropping (if that is even a word?) is best. Plus, Google Photos will often automatically suggest a crop that cleans any remaining border.
The last step is converting each contour into a coordinate that will make up the body of the server's response.