User Interface Overview
Discover AutoCropper's web-based scanning software through our comprehensive User Interface Documentation. Learn to efficiently manage and crop your photos with intuitive tools and features.
AutoCropper is a powerful web-based scanning software designed to streamline the photo scanning and cropping process.
This user interface documentation provides a comprehensive overview of the application's main sections and functionalities, ensuring you make the most out of your scanning experience.
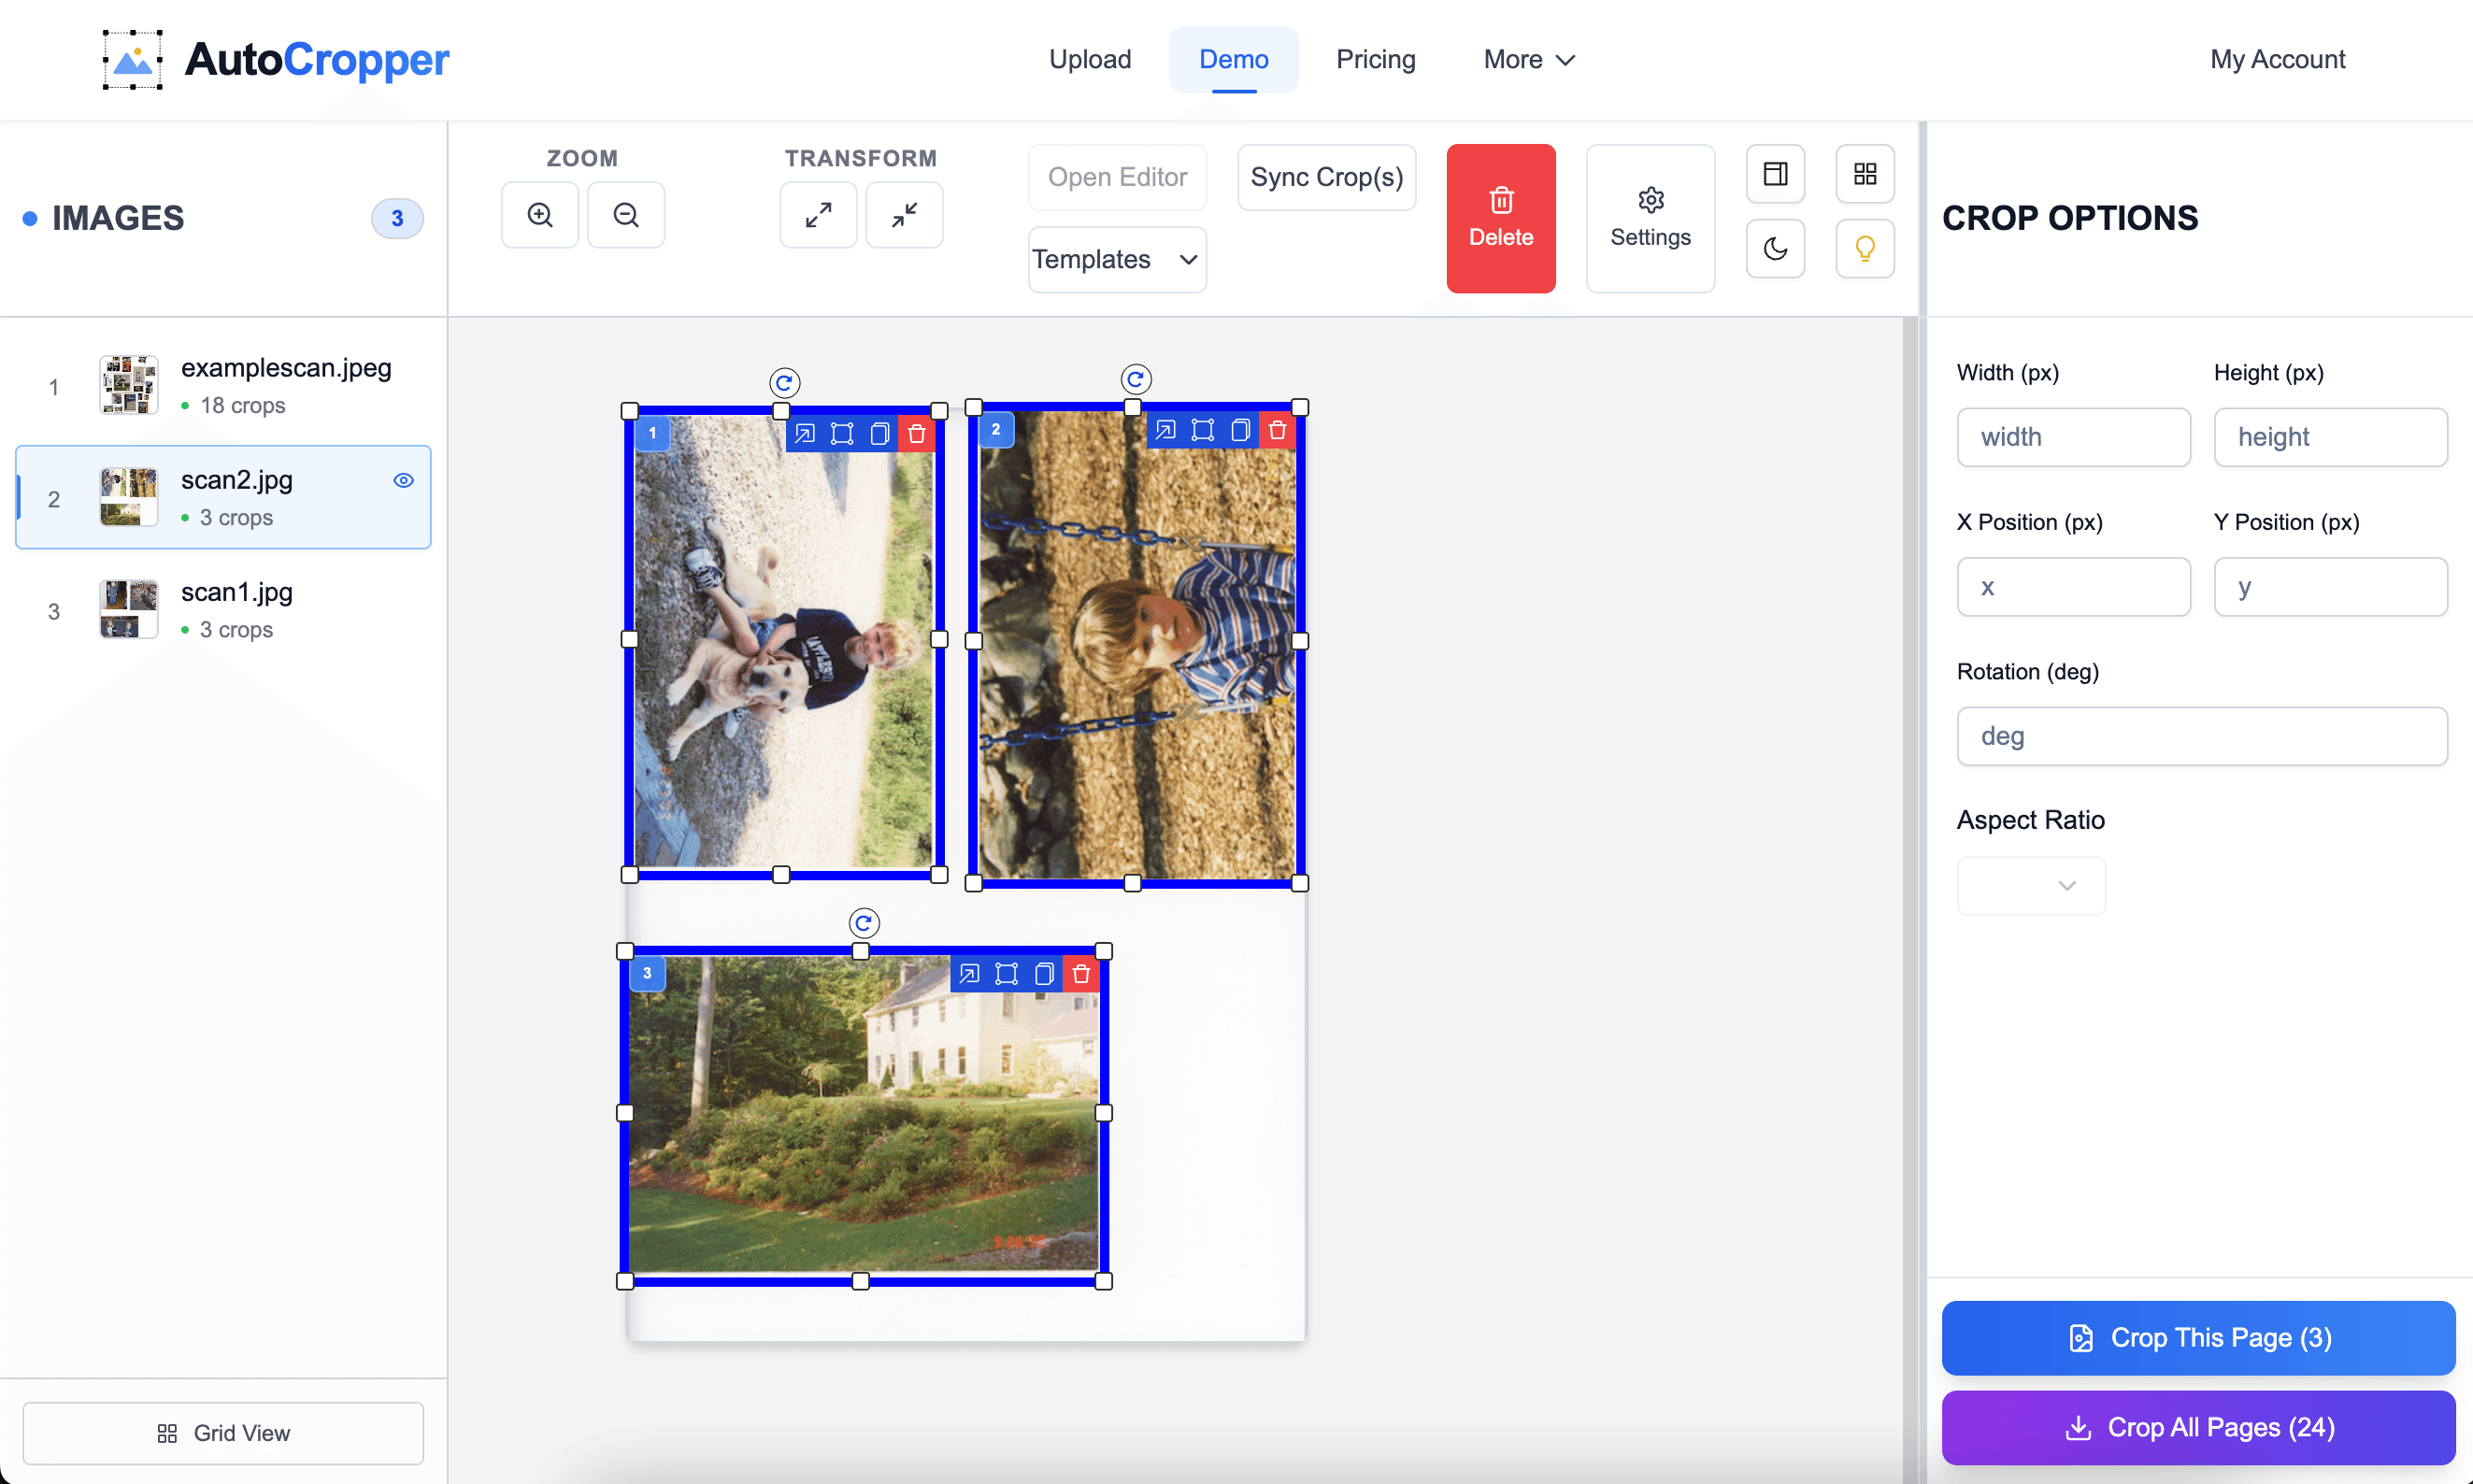
Top Toolbar
The Top Toolbar is a fixed header located at the top of the main display area. It provides quick access to essential tools that enhance your scanning and cropping workflow.
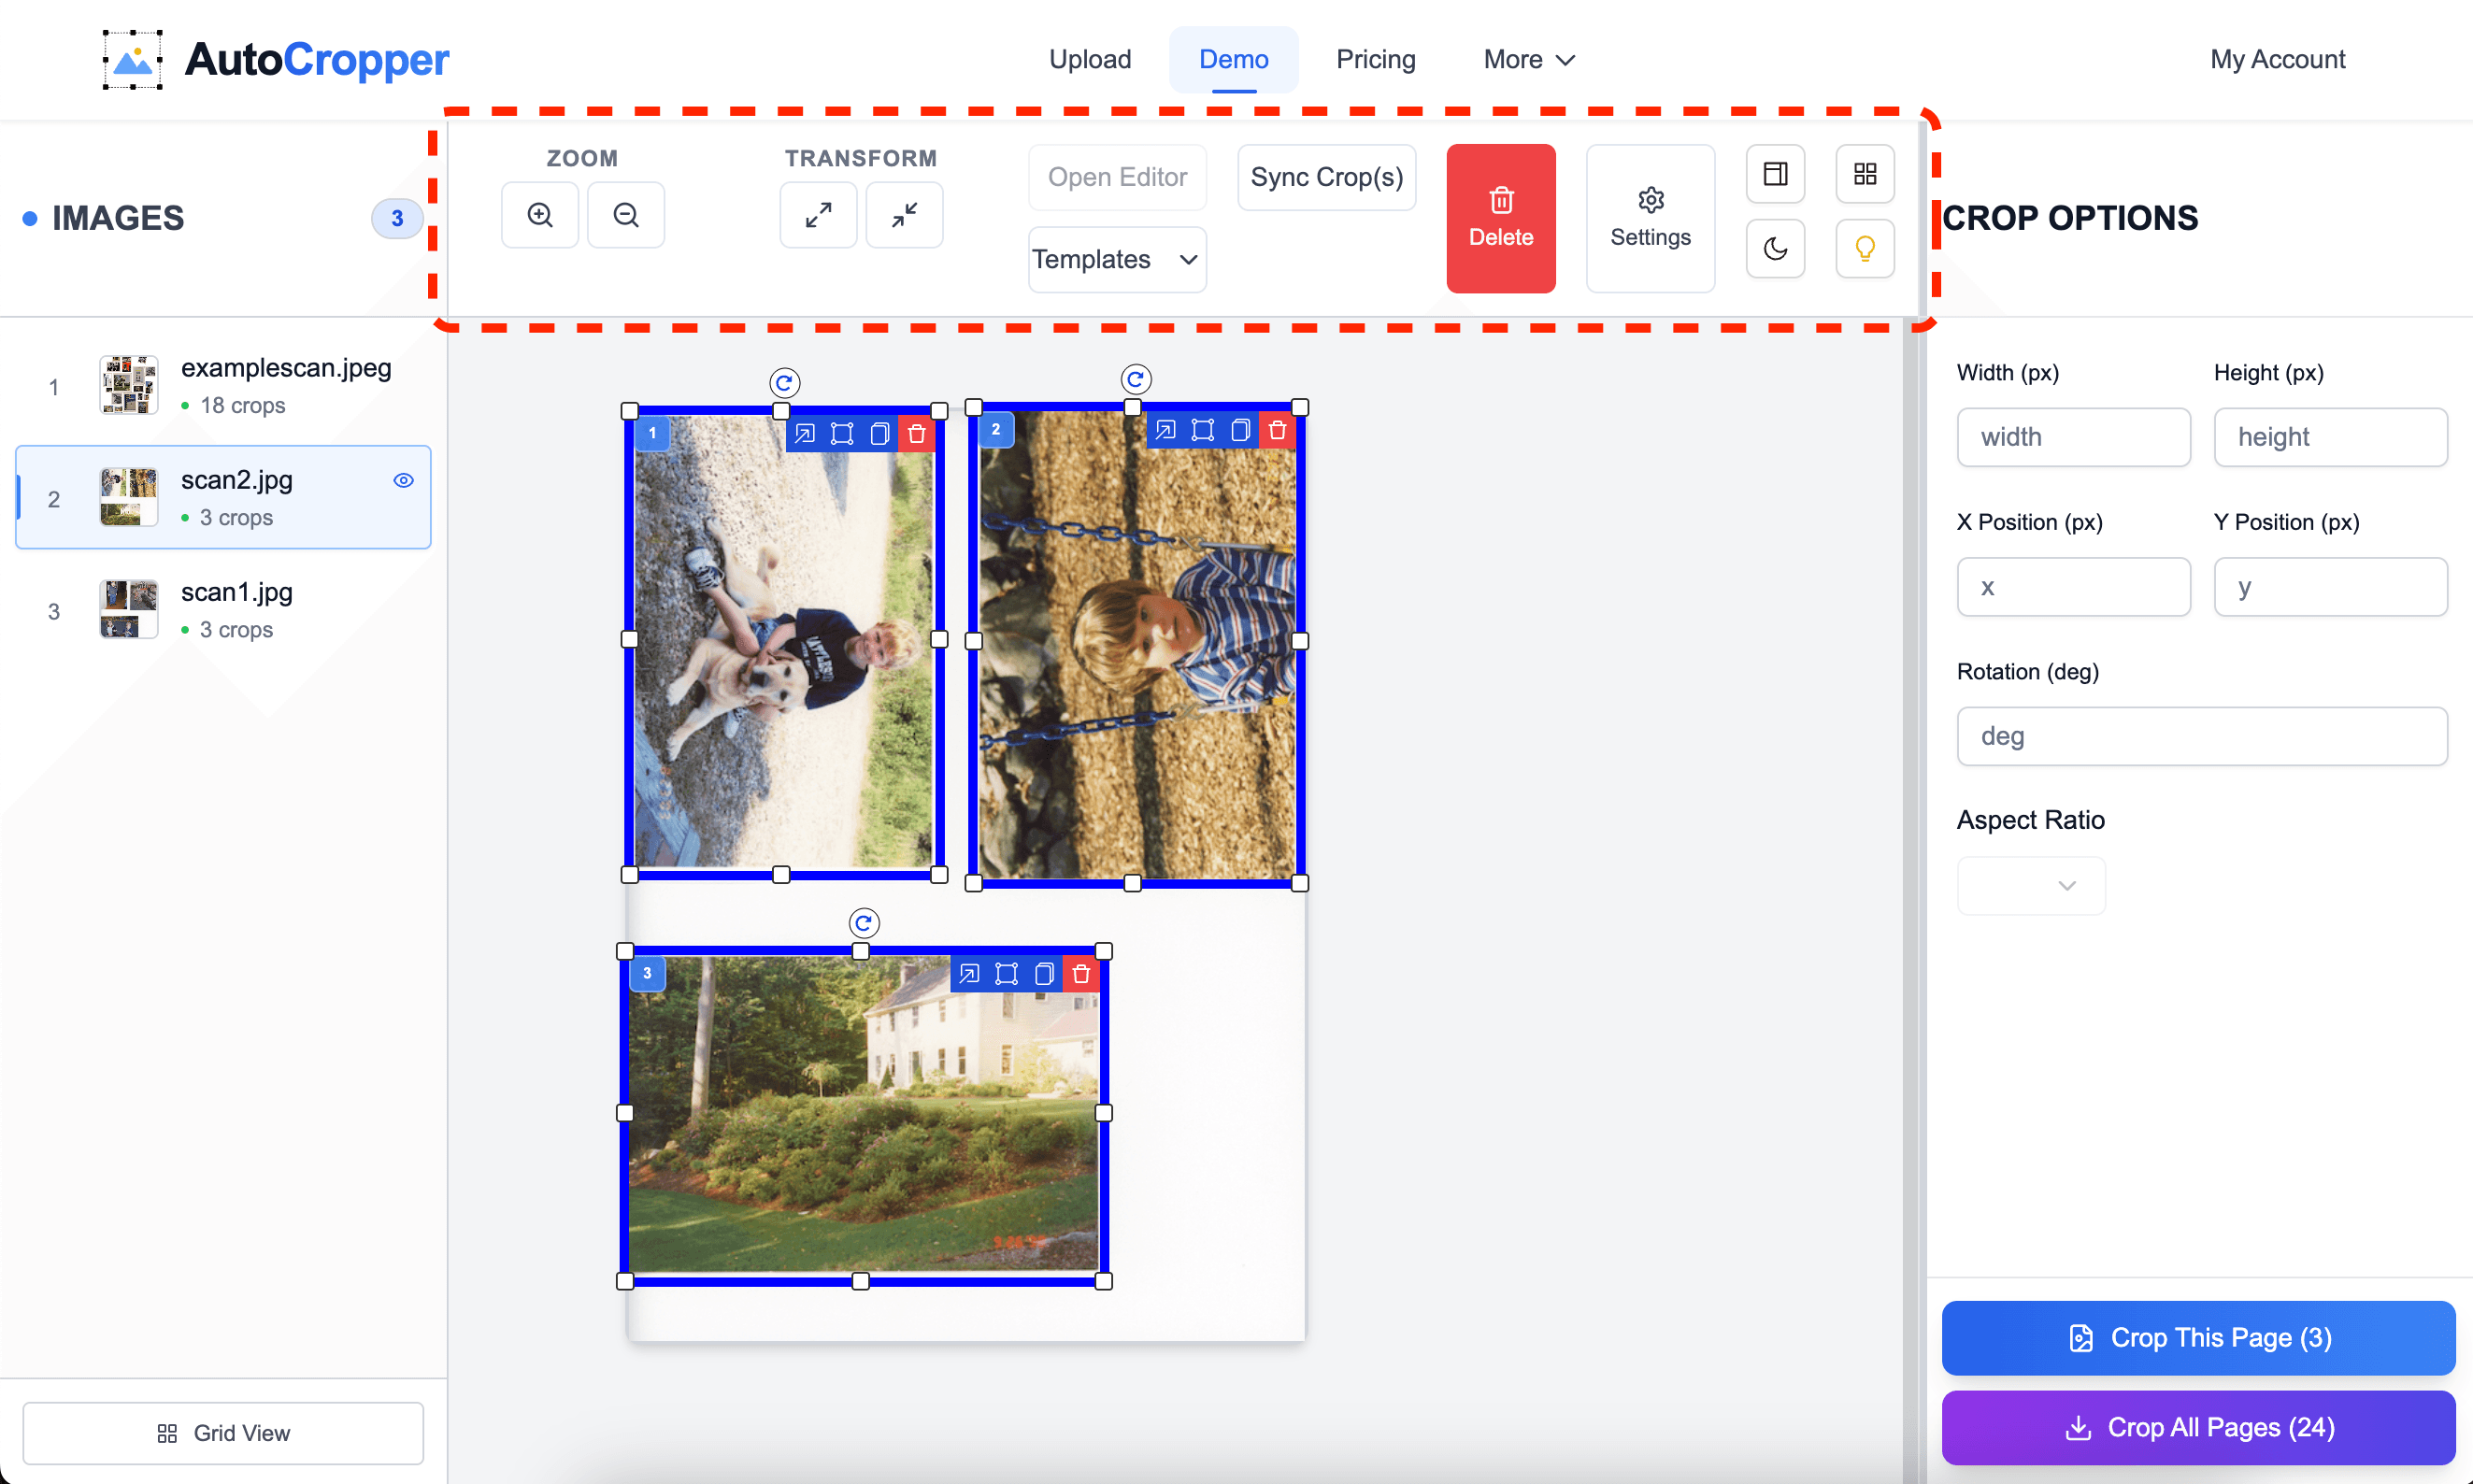
Zoom In Button
The Zoom In button is located on the left side of the toolbar and increases the size of images in the main display, allowing for detailed inspection and precise cropping.
Functionality:
Single View:
Enlarges the selected image for meticulous editing.
Grid View:
Adjusts image size to manage multiple images on larger screens.

Zoom Out Button
The Zoom Out button is located on the left side of the toolbar and decreases the size of images in the main display, enabling a broader view of multiple scans.
Functionality:
Single View: Fits the entire upload within the display area.
Grid View: Reduces image size to display more images simultaneously. Useful for large screens

Open Editor Button
The Open Editor button launches the Advanced Editor, allowing for detailed crop adjustments.
Note: Enabled only when a crop is selected (indicated by animated borders around the crop rectangle).

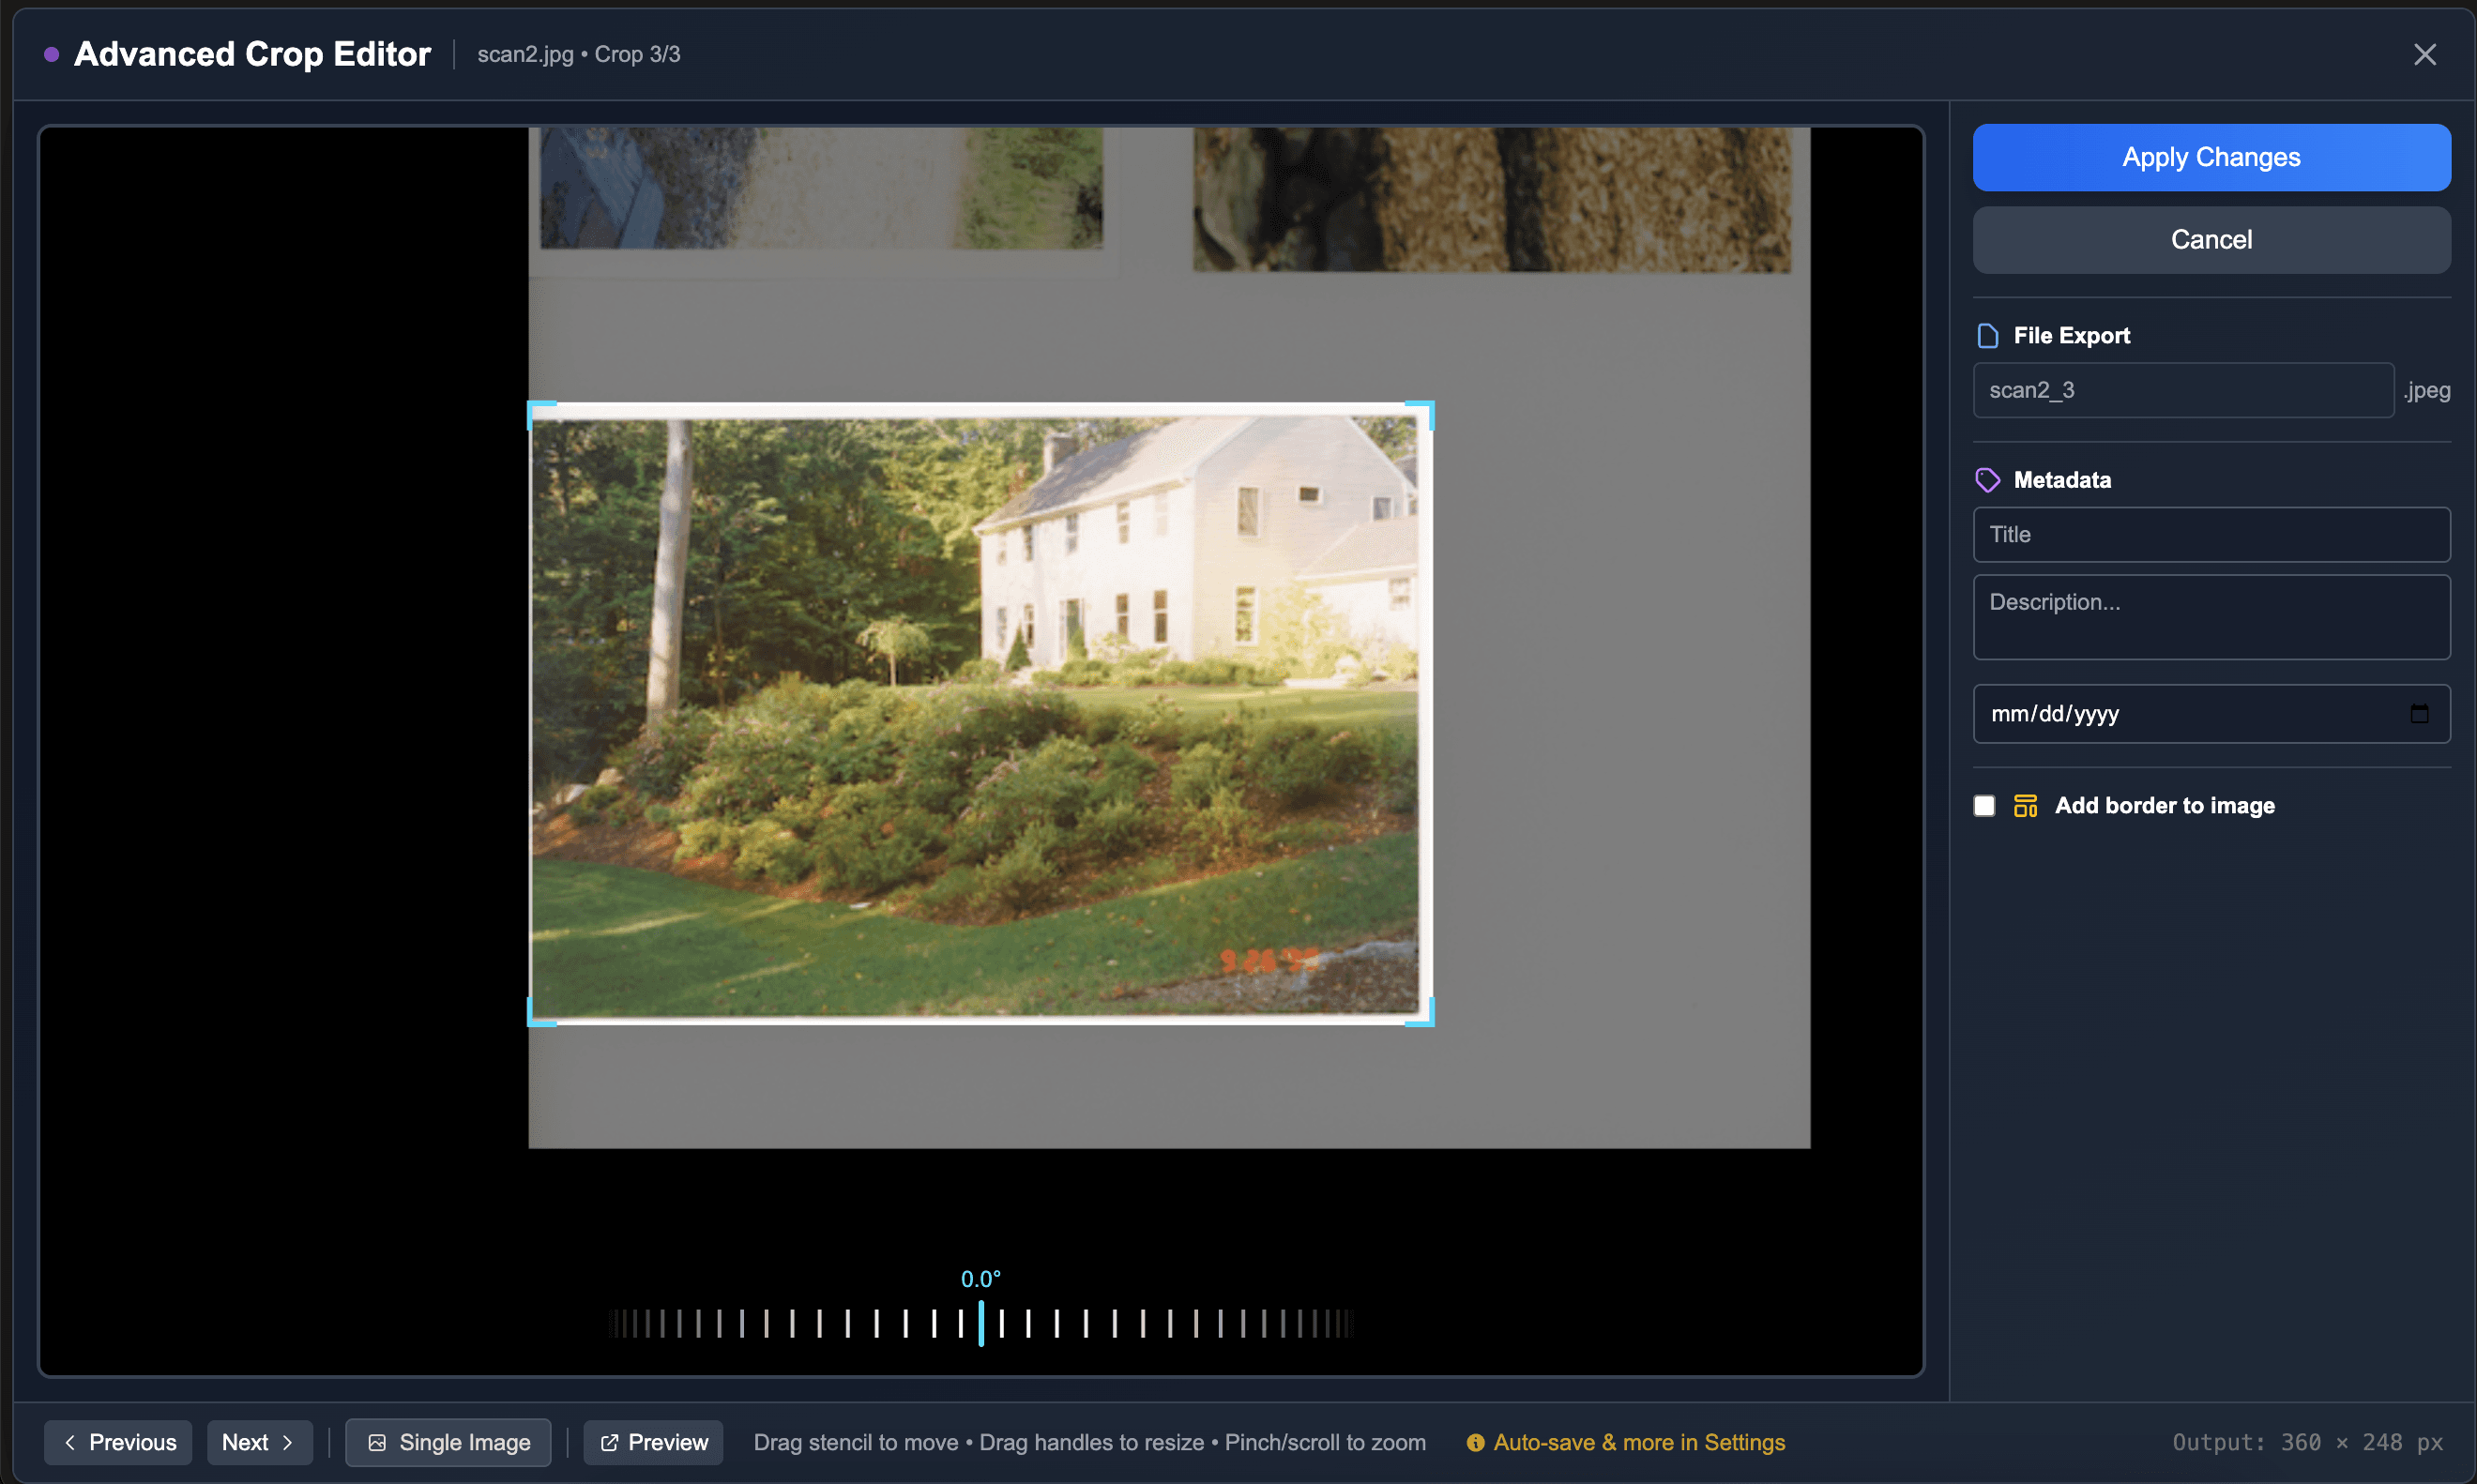
Example usage of the Advanced Editor:
Delete Button
The Delete button removes selected crops from your scans. The Delete button with the trash bin enables batch deletion of all crops.
Functionality:
Single Crop Deletion: Prompts confirmation to delete the selected crop.
Batch Deletion: Available as a larger red button for deleting all the crop areas on all uploaded images, or just the crops on the currently selected image.

Sync Crop Button
The Sync Crop button converts the currently selected crop into a Synced Crop, applying the same crop area across all uploaded images. This ensures consistency and saves time when managing multiple scans.
Uniform Crops: All uploaded images will have identical crop areas.
Automatic Updates: Any changes to a Synced Crop will automatically apply to all its siblings.

Note that Synced Crops are scaled relative to the aspect ratio or dimensions of their siblings. Meaning if all uploaded images have the same aspect ratio and dimensions, all output crops from each image will have identical dimensions.
Templates Button (Beta)
The Templates Button is a new feature that allows you to either Save a New Template, or Apply a Template. Templates are useful for users cropping the same areas of different images on a regular basis.
To Save a Template, the app layout must be in Single View. Clicking Save Template will store a new template that can be applied in the future. A template simply stores the number of crops and their locations.
To Apply a Template, click the Templates button and select your saved template. You can choose between applying the template to just the selected image, or all images. Applying the template to all images will convert all the crops created by the template into Synced Crops, similar to the Sync Crop Button.
Settings Button
The Settings button opens the Application Settings modal, allowing customization of various parameters.

Change Sidebar Button
Located on the far right of the Top Toolbar, the Change Sidebar button toggles between the Adjust Crop Sidebar and the Crop Viewer Sidebar.

Change Layout Button
Also on the far right of the Top Toolbar, this button switches the main display between Grid View and Single View.
Tooltip: Displays "Single View" in Grid View and "Grid View" in Single View.

Left Sidebar
The Left Sidebar section displays each uploaded scan as a card, allowing easy navigation and management of your scans.
Upload List
Each card indicates the number of individual images contained within the upload.
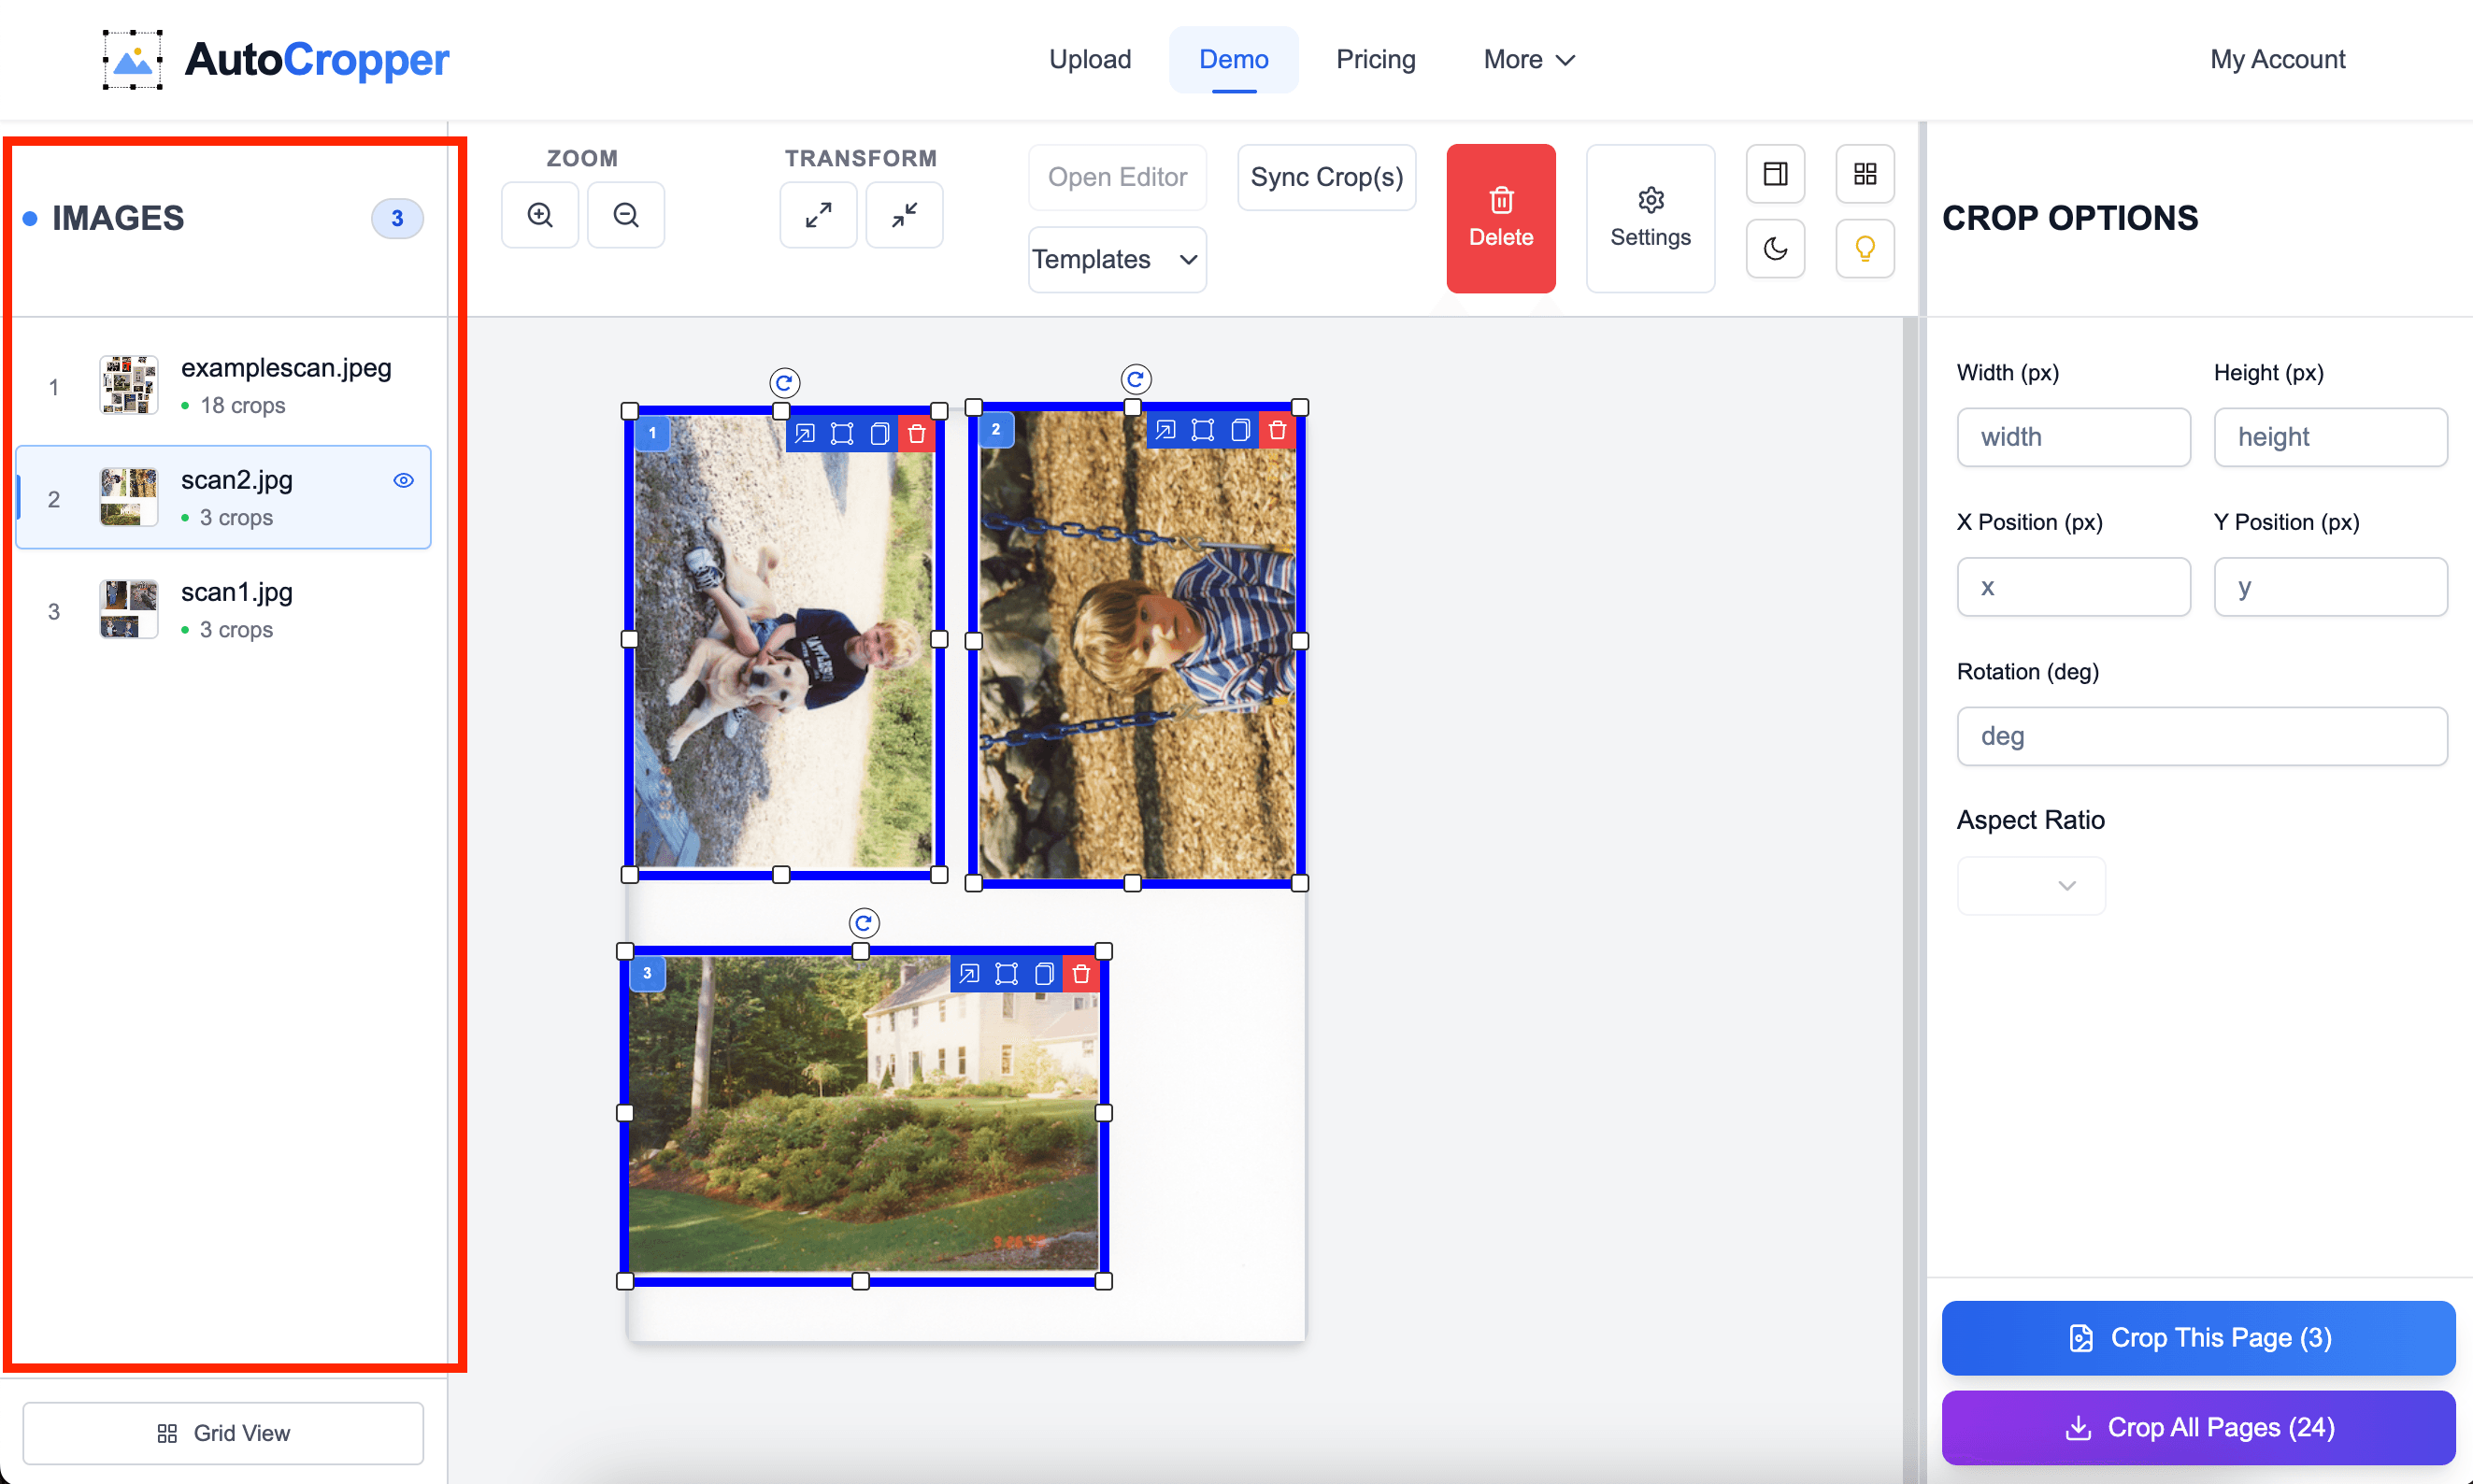
Navigating Uploads:
Clickable: Click on any upload card to navigate between different scans and review the detected crops.
Keyboard: Use the left and right arrow keys to move between scans.
In Grid View, the Uploaded File List is disabled and all uploads are displayed at the same time in a scrollable grid.
Right Sidebar
The Right Sidebar offers tools for adjusting crops or viewing crop previews, depending on the selected mode.
There are two modes, the Adjust Crop sidebar, and the Crop Viewer sidebar.
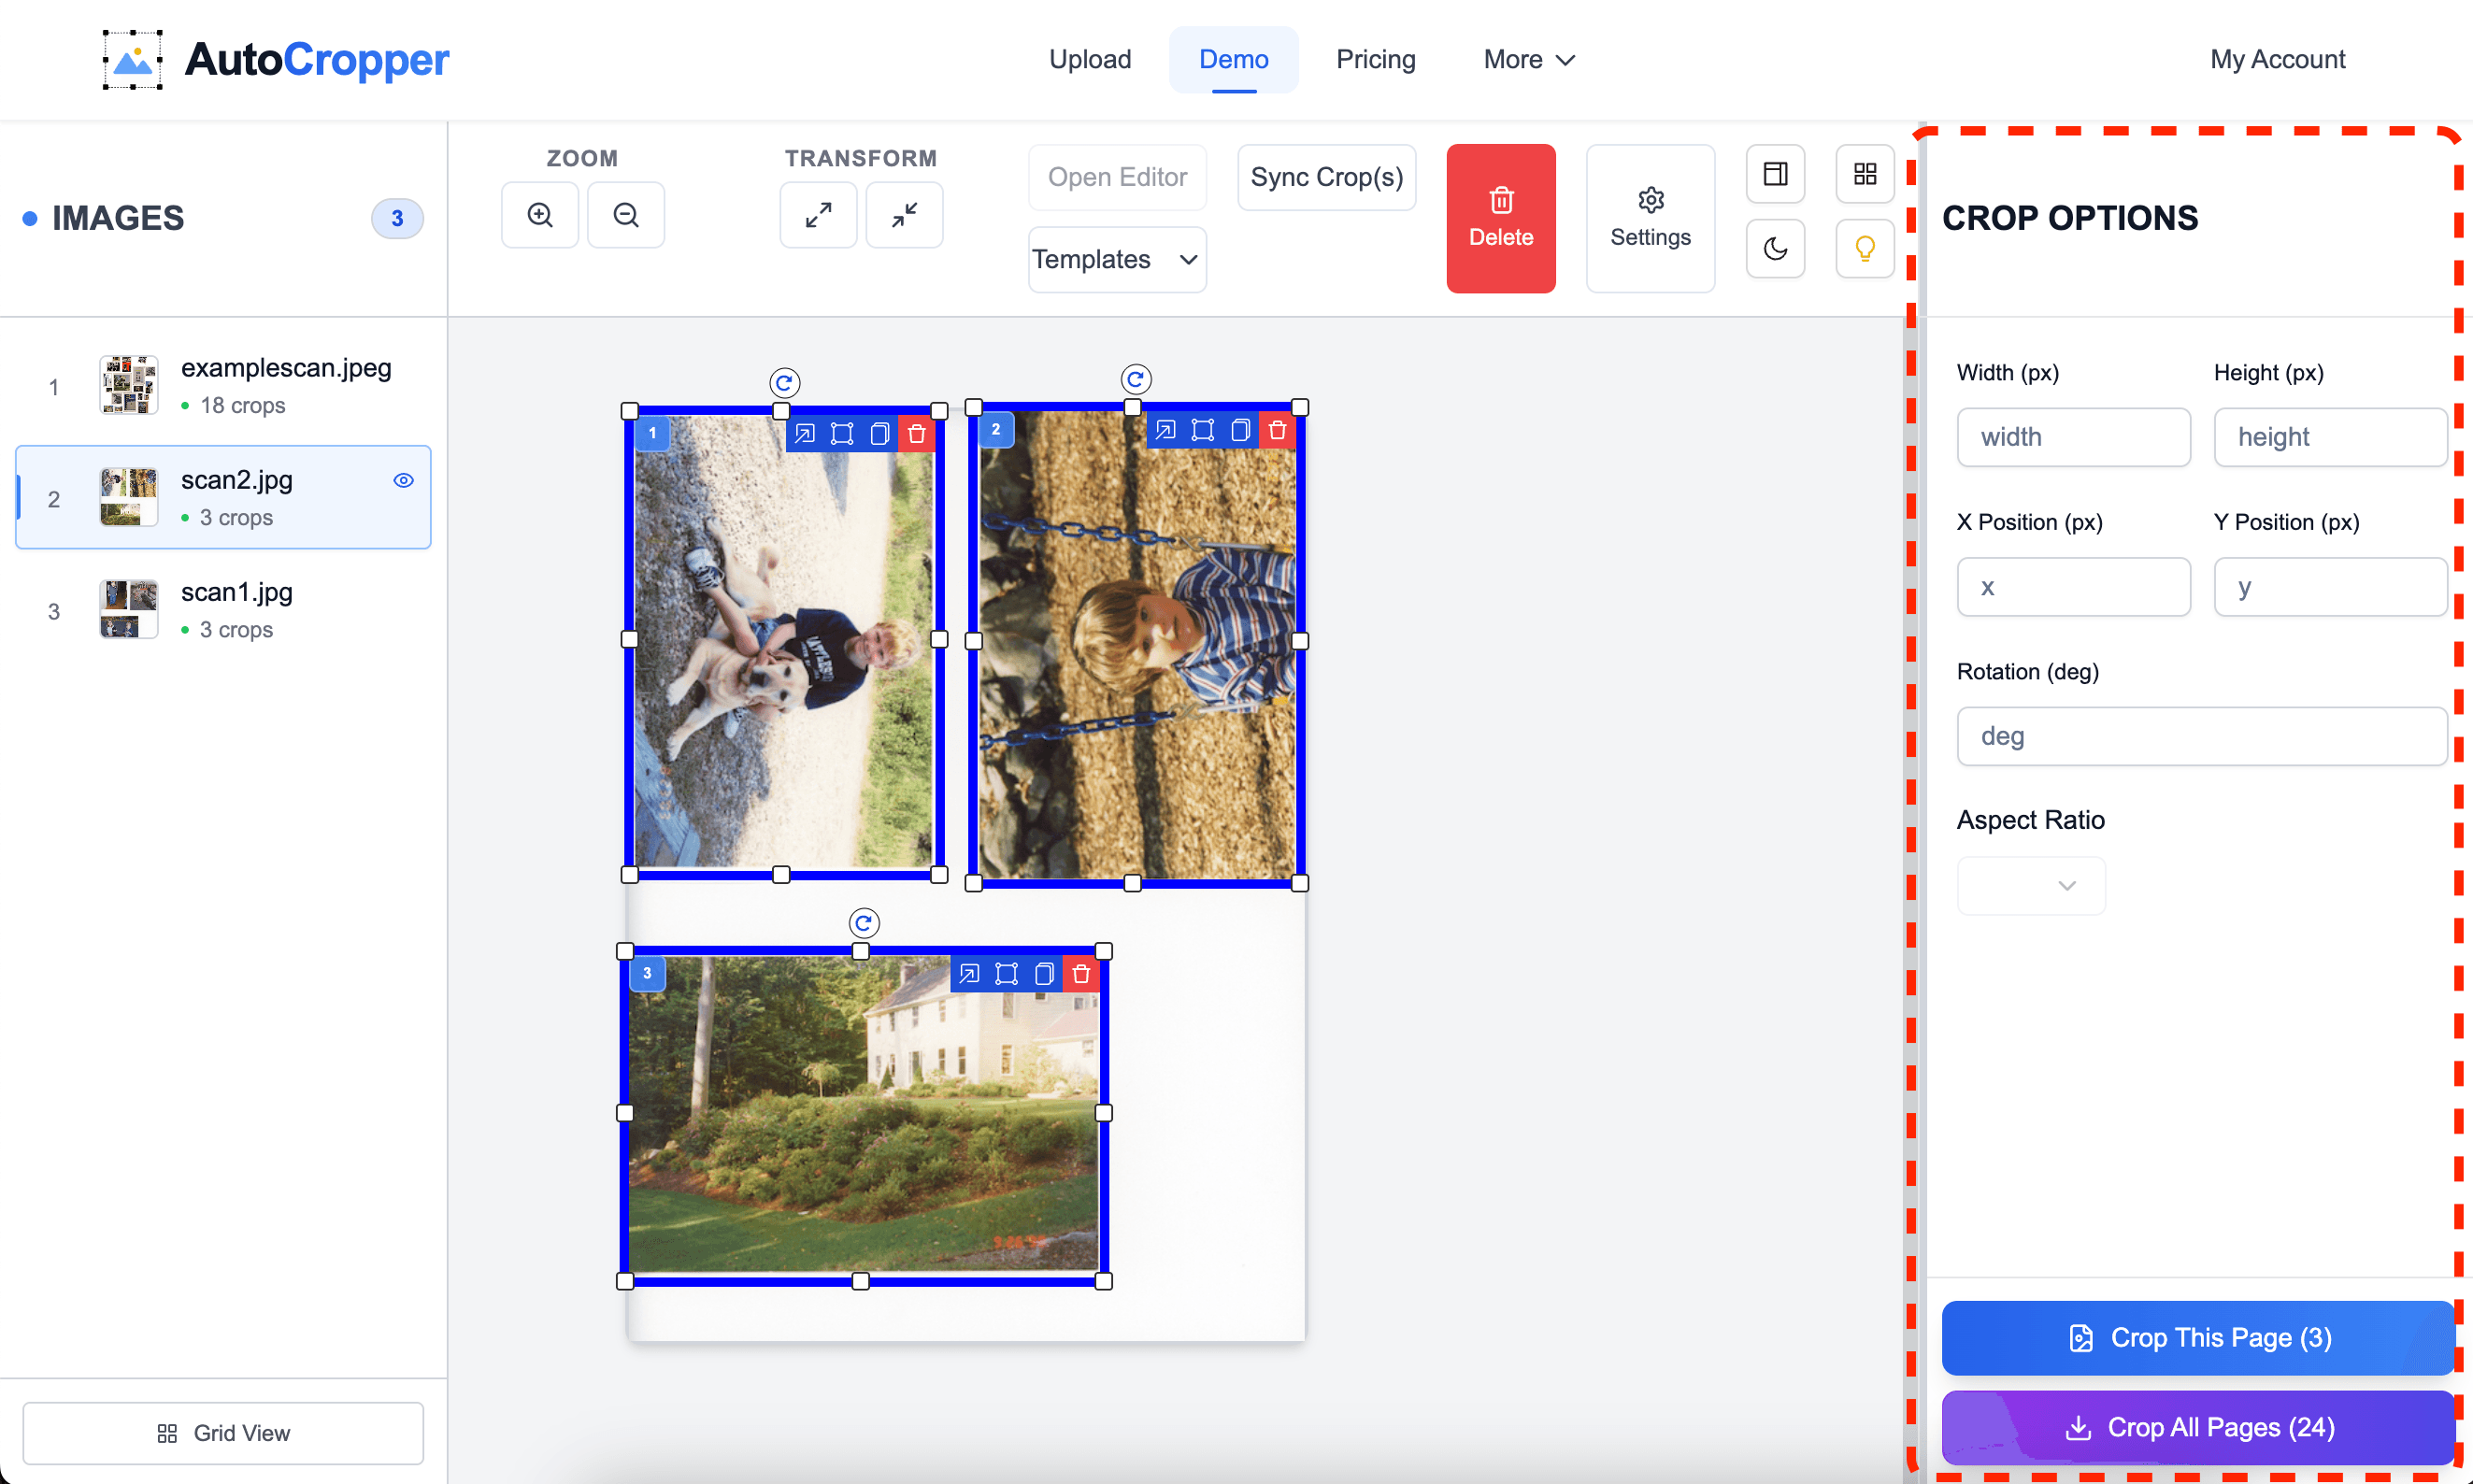
Adjust Crop Sidebar
Provides input fields for precise crop adjustments, including position, size, aspect ratio, and rotation.
Crop Viewer Sidebar
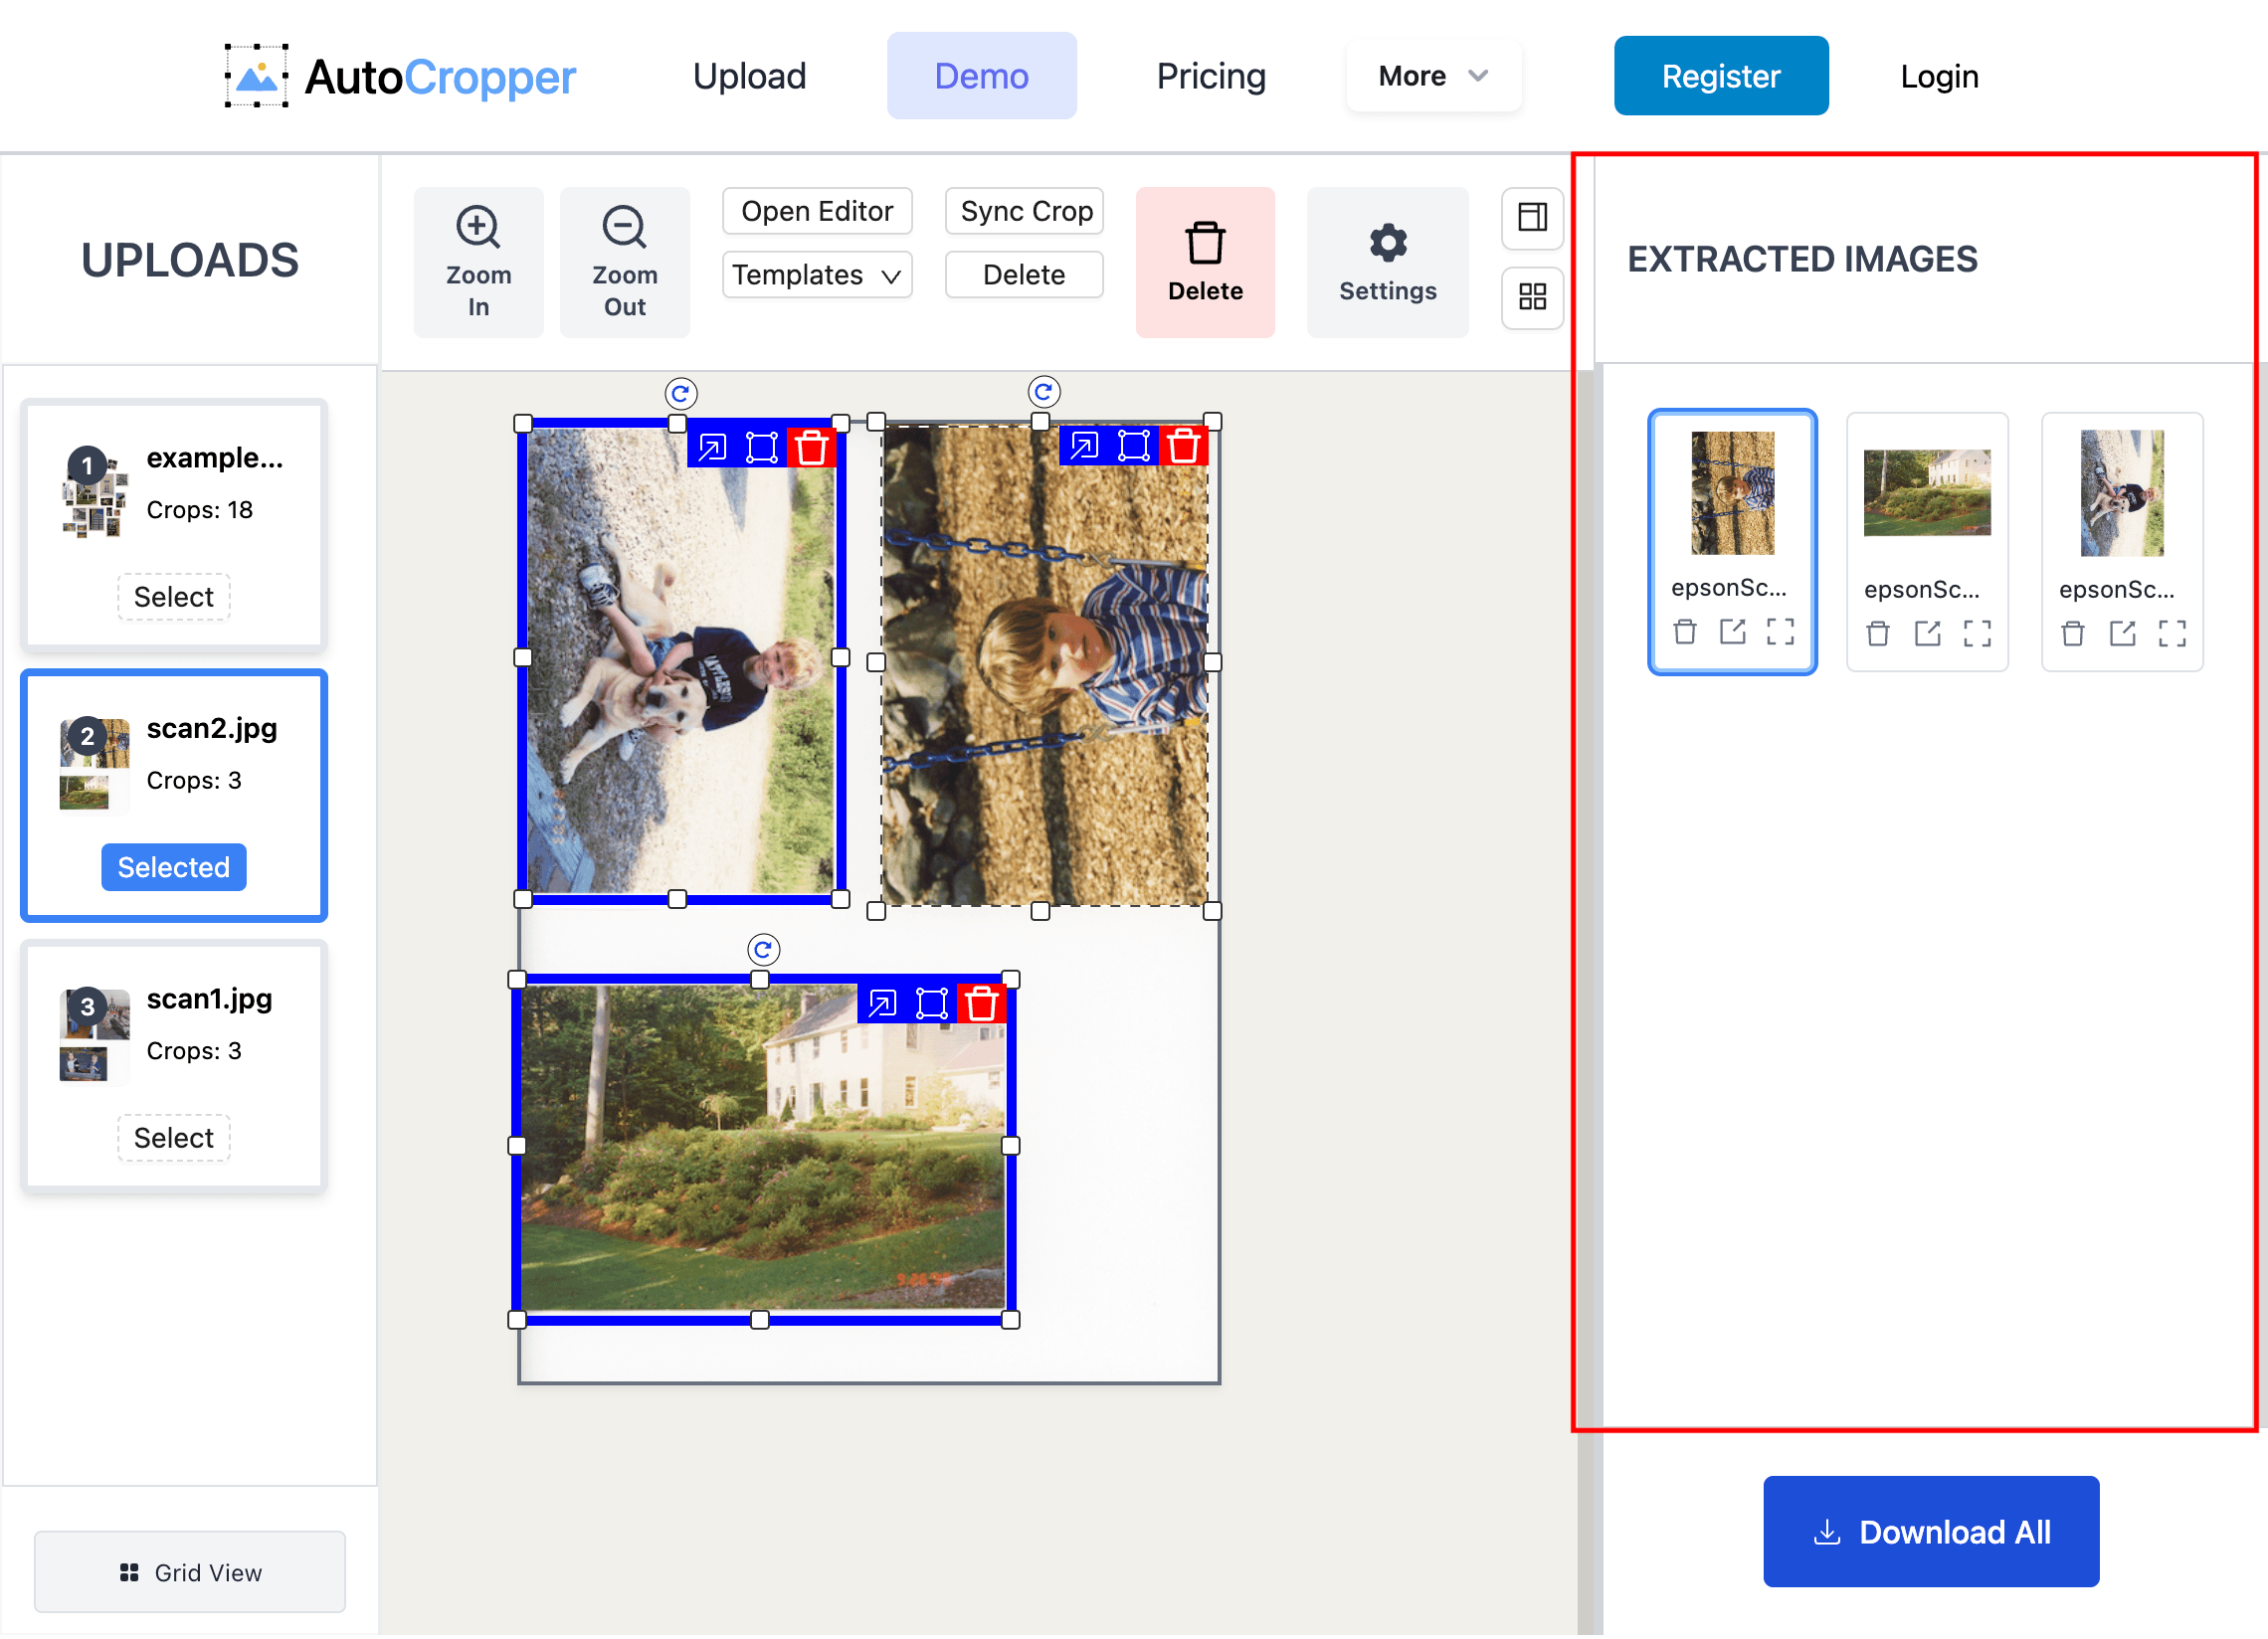
Displays a grid of crop previews for the selected image, allowing quick access to individual crop editors.
Features:
Image Previews: Low-resolution previews of each crop.
Action Buttons: Preview in new tab, Open Editor, and Delete Crop.
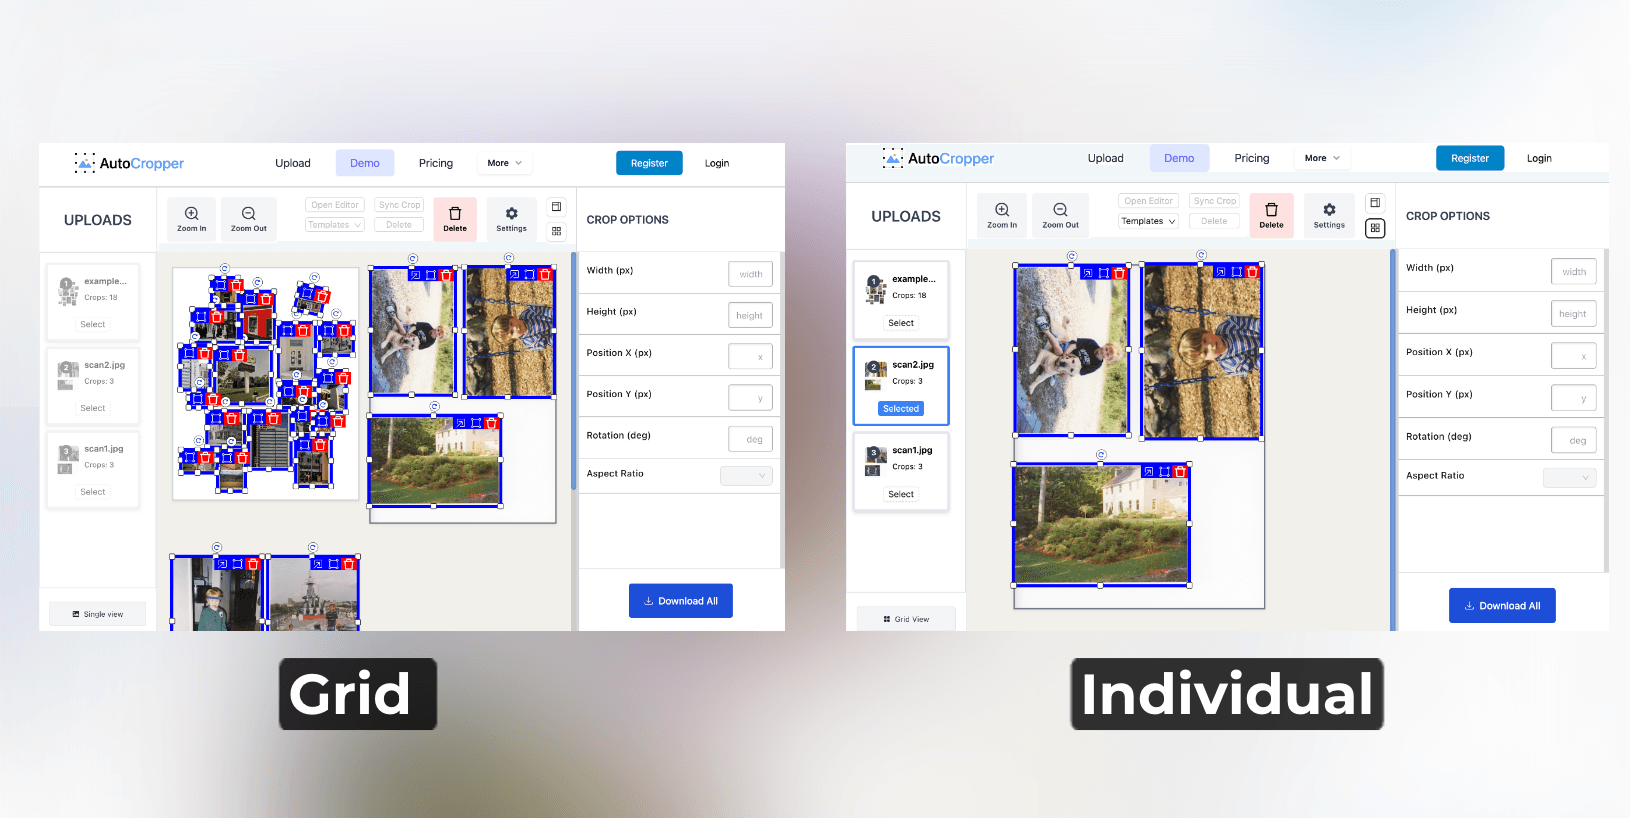
Grid vs. Single View
There are two layouts in the AutoCropper UI. Single view shows one upload or scan at a time, and enables the Upload List. This is helpful when working with lots of scans, as you can flip through each upload individually to review the detected images with greater detail.
Grid View lets you see all your uploaded images at once in a scrollable grid. This is helpful if you are trying to quickly review the detected crop areas on all your uploaded images.
Advanced Editor
The Advanced Editor allows you to more precisely adjust the crop dimensions, adjust the crop size and adjust the crop rotation to straighten it.
Opening the Editor
You can open the advanced editor by:
Double clicking any crop
Clicking the Adjust button on any crop (to the left of the red delete button)
Selecting a crop, and clicking the "Open Editor" button in the top menu
The advanced editor will open. If you make any adjustments by accident, you can reset to the original dimensions. Be sure to click Save Changes when done.
Adjusting the Crop Area
To adjust an individual crop's dimensions via the Advanced Editor, click and drag on any edge:
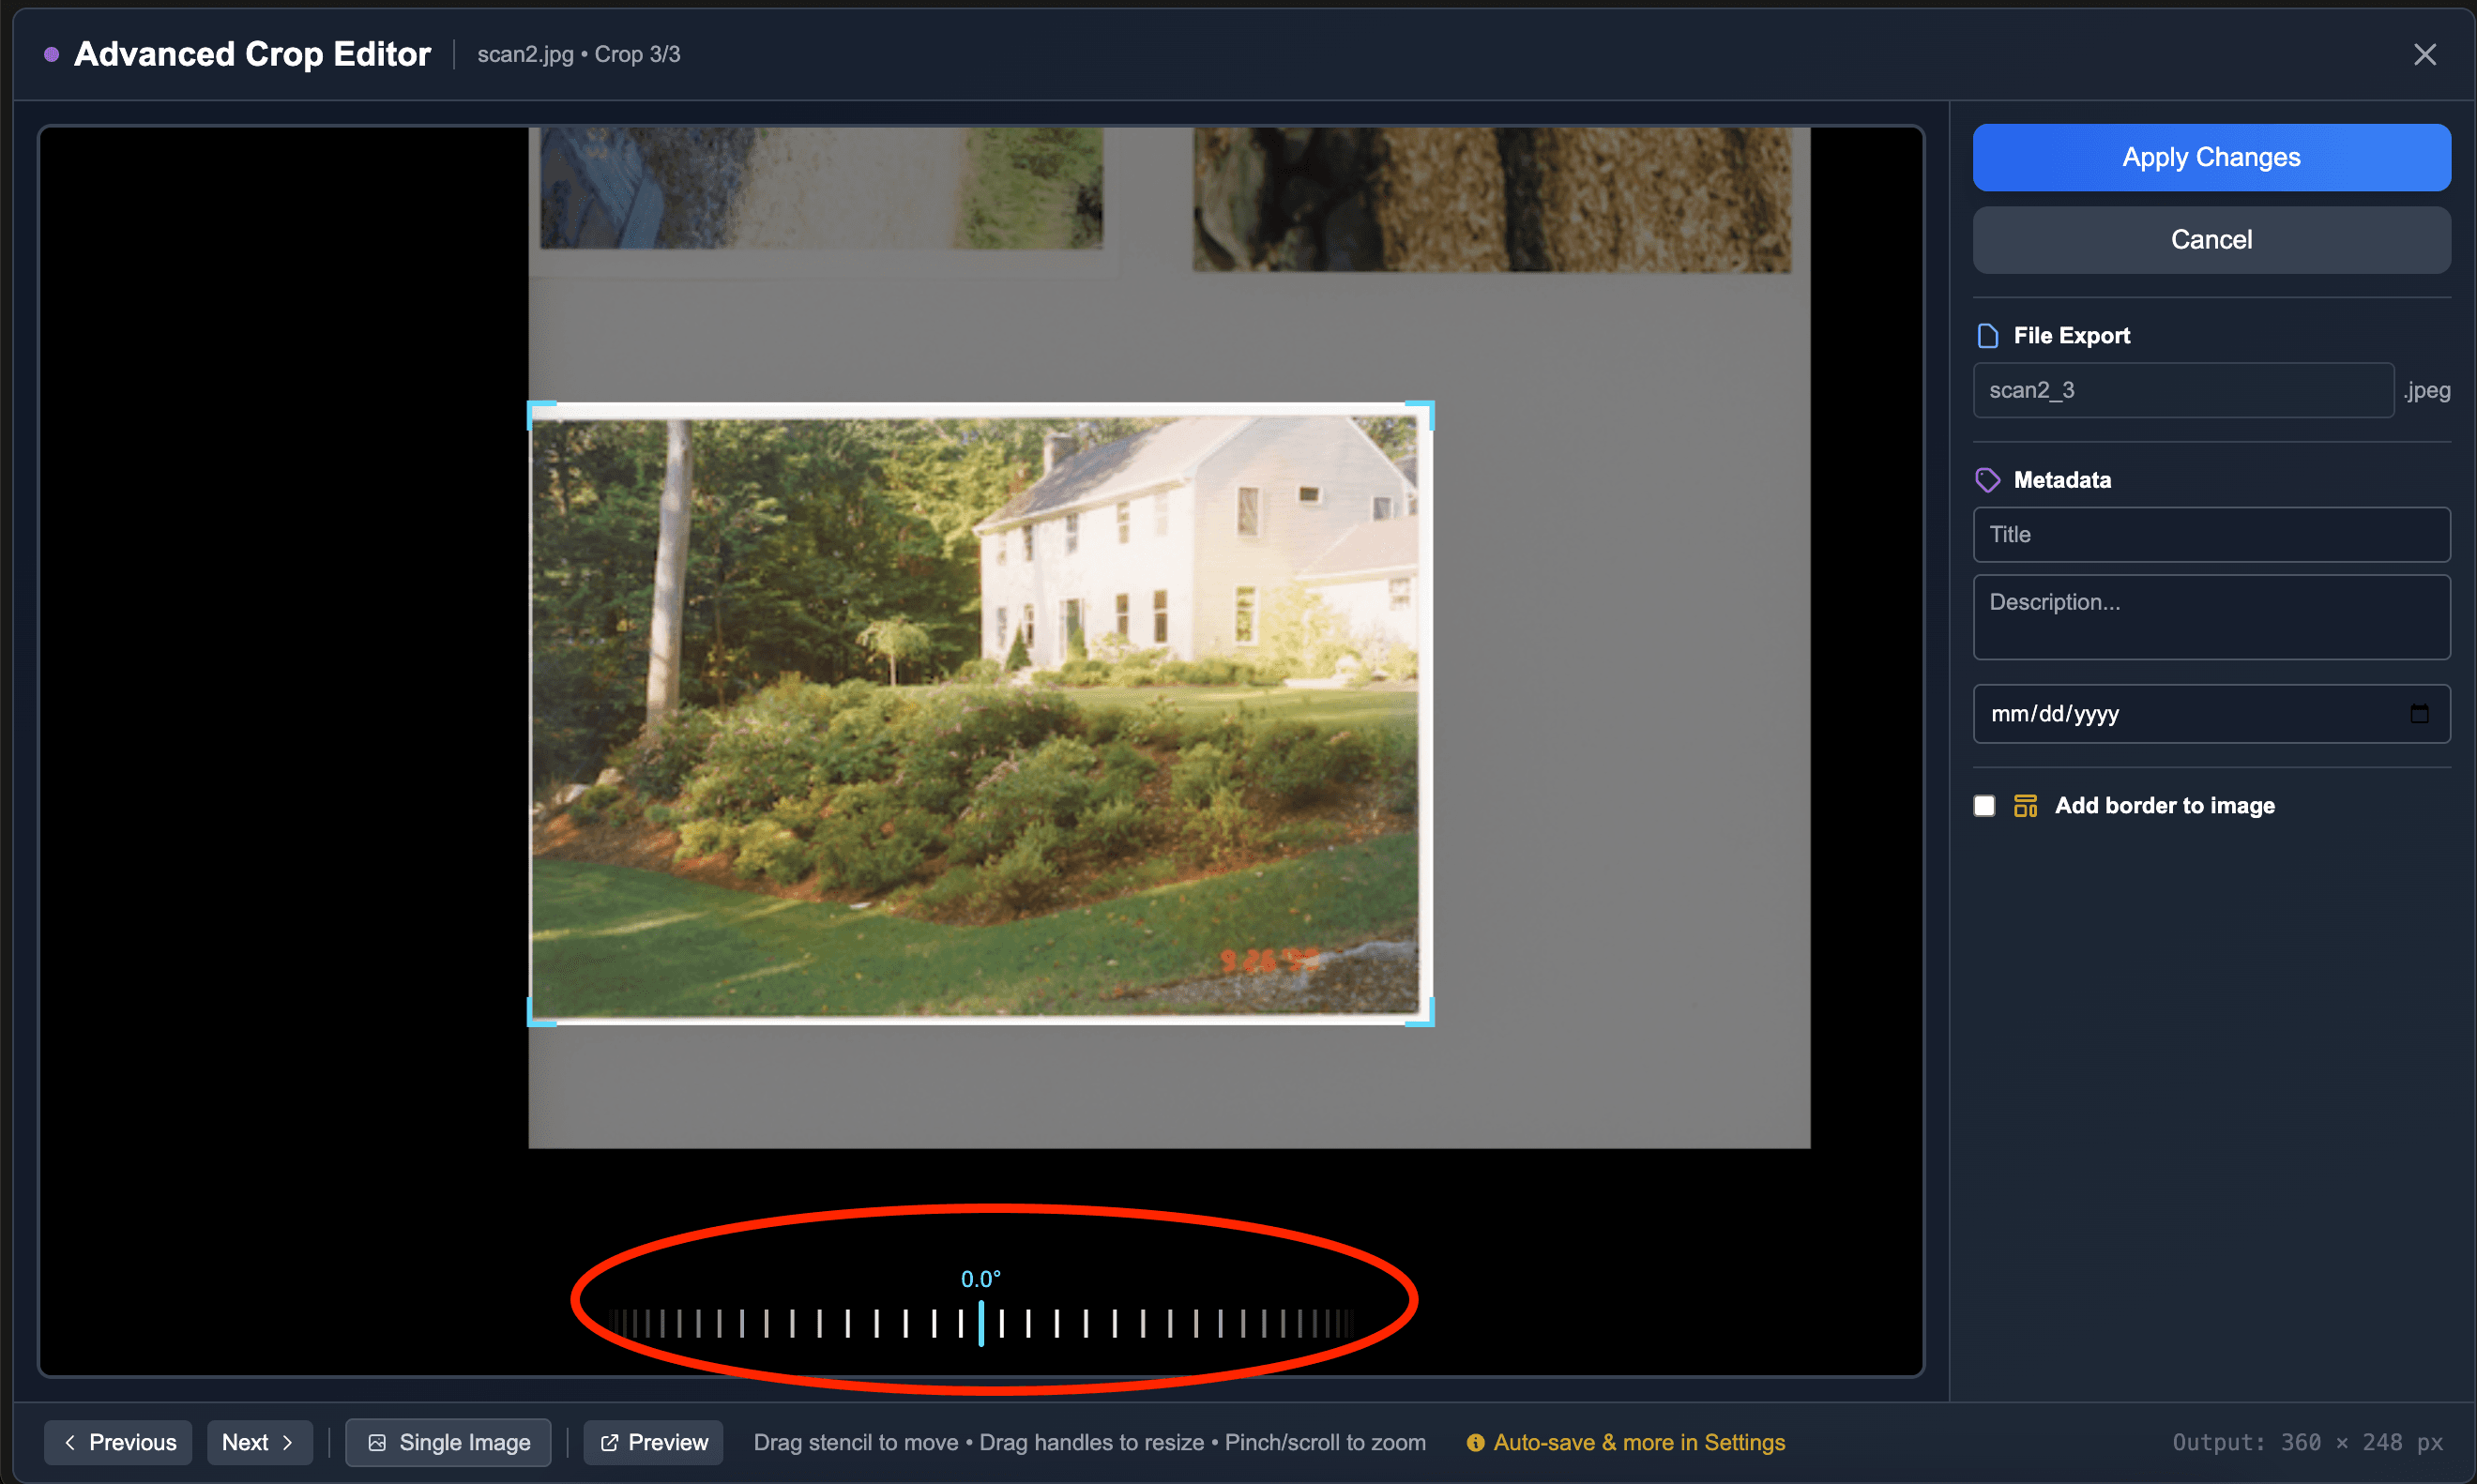
You can also apply left and right rotations to correct and straighten your crop.
The rotation adjustment is located at the bottom of the advanced editor:
Saving your adjustments
To save your adjustments made in the Advanced Editor - crop location, dimensions, or rotation angle, click the "Save Changes" button:
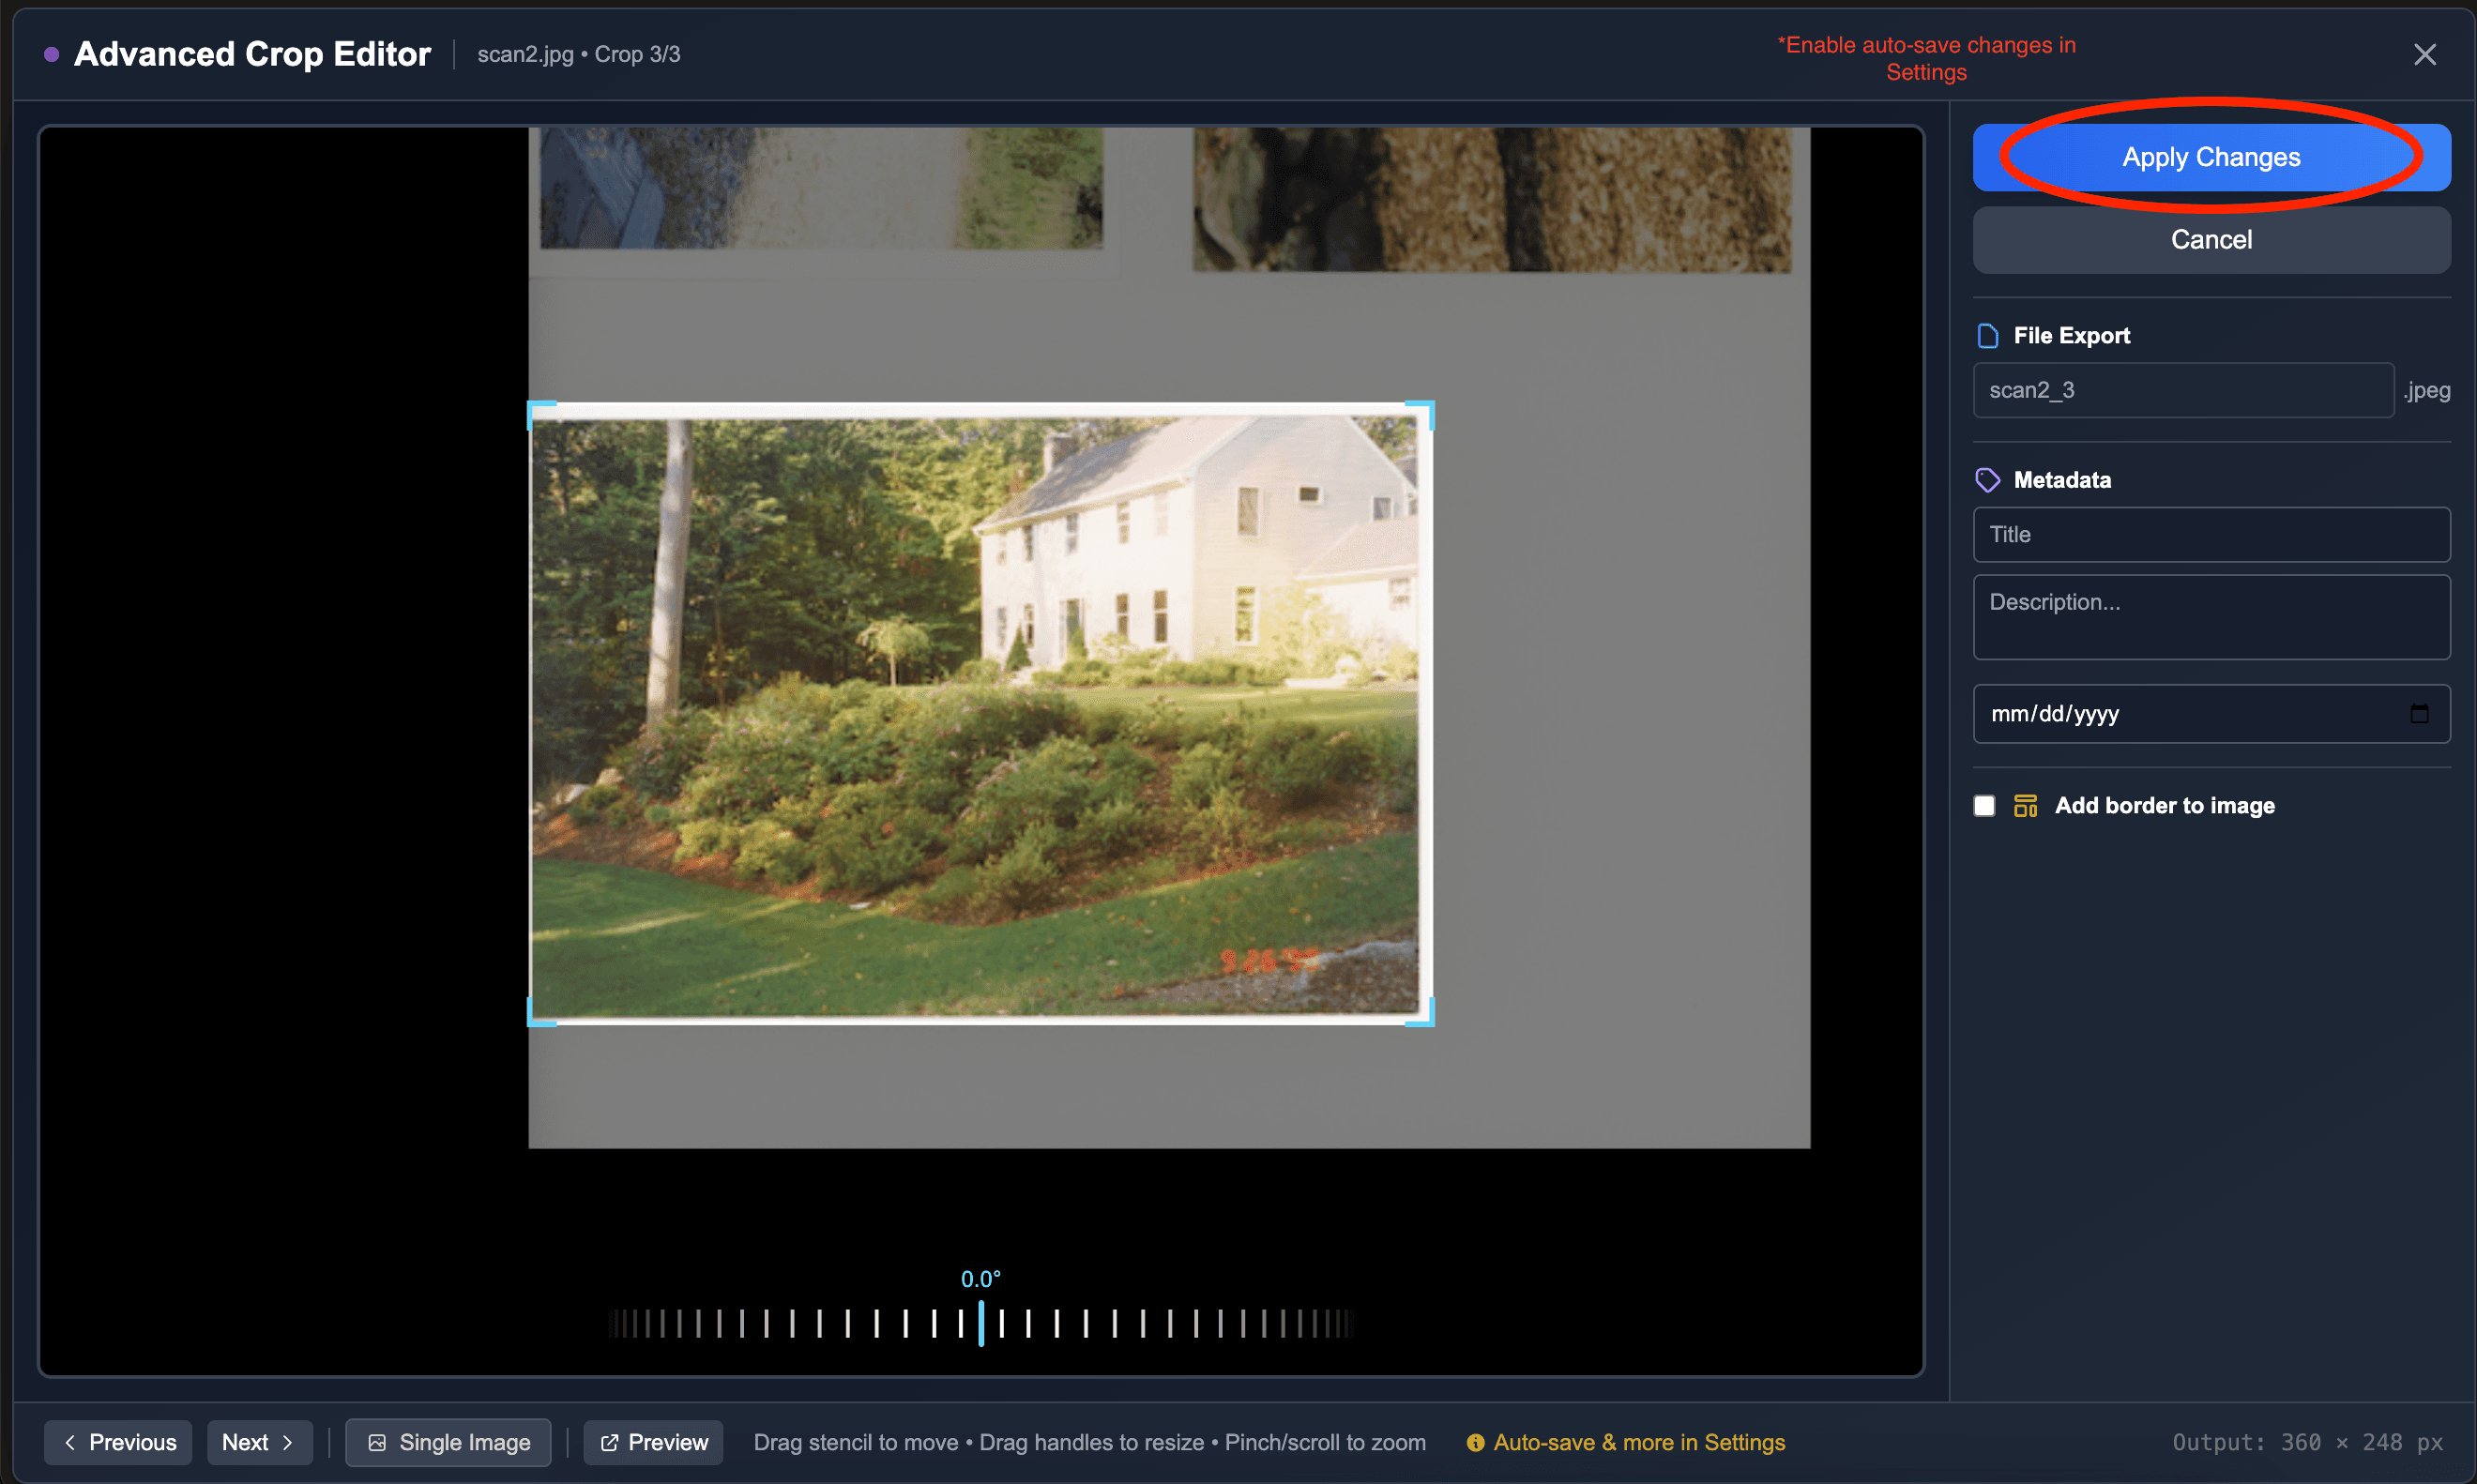
You will notice the crops outlined in blue on the parent images will update to reflect your adjustments.
Settings
See dedicated AutoCropper Settings Documentation page.
Download Button
Located at the bottom of the right sidebars, the Download All button exports all cropped images into a single ZIP file for easy download.
All crop areas on ALL images will be exported together (regardless of your current view).