

If you're looking for a way to digitize your physical photos, scanning them is a great choice. However, manually scanning each photo and cropping it individually can be a tedious and time-consuming task. Fortunately, the Epson Perfection V600 Photo scanner can scan multiple photos at once and output each image to separate files automatically. In this article, we'll explore how to use this scanner to scan multiple photos and crop images more efficiently using AutoCropper.
Before we begin, it's important to make sure you have the required drivers installed on your computer. Epson's scanning drivers can be downloaded for both Mac and Windows from Epson's website. I've also written a tutorial explaining how to install Epson scanner drivers. Once you have the drivers installed, you can choose from different software options to scan multiple photos.
Using Epson SmartScan software suite
The SmartScan software suite is a convenient option to scan multiple photos at once with the Epson V600. Here's how to do it:
Open the SmartScan software suite and adjust the default settings. To ensure the quality of your photos, we recommend increasing the scan resolution to 600 DPI, which provides enough quality to preserve your images while also not taking too long.
Place the photos on the scanner bed and align them with the guides on the scanning window. Here is how I aligned three photos on the scanner bed:
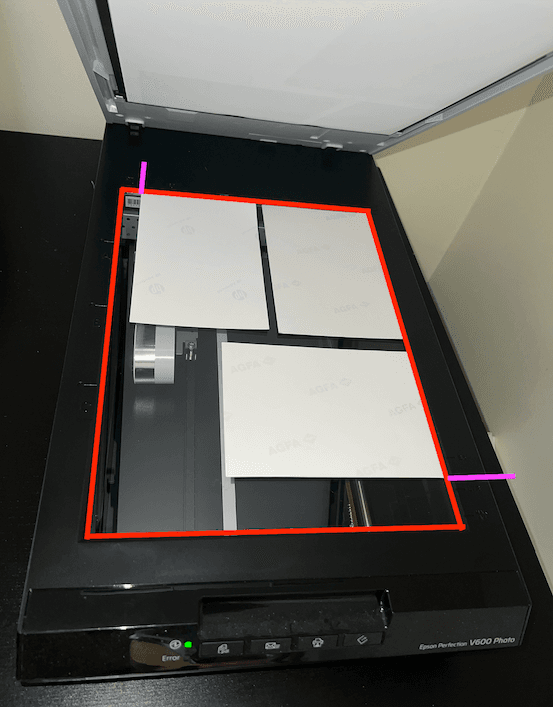
Shows proper placement of multiple images on the Epson V600 photo scanner. Notice the pink lines. On the Epson V600, place photos from the top right corner, which is the (0, 0) coordinate. About 2 inches from the bottom, and 2 inches from the left is the cutoff. You might not even notice that you are cutting the bottom part of your scanned images until later!
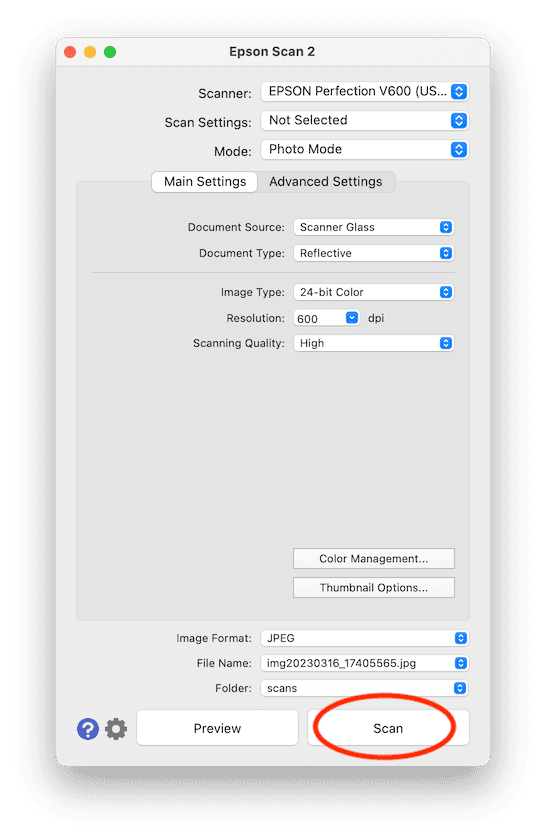
Click the Scan button on the bottom right (circled in red), wait a few seconds, and the software will automatically separate the scanned images into individual files:
The software will automatically separate the scanned images into individual files. After waiting a whopping 1 minute and 31 seconds to scan just three photos (I timed it!), here is our output:
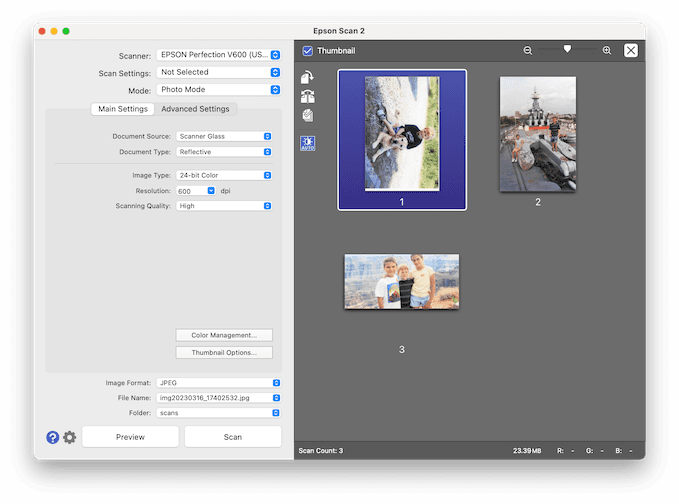
Review the output. In this example, we got three cropped images. Unfortunately, it looks like Epson's software cut out half the sky in one of our images - take a look at image 3 above! With AutoCropper, you could not only do this faster, but also more accurately.
While this method works pretty well, it can be time-consuming if you have a large number of photos to scan. Additionally, you may still need to manually crop and save each individual photo, which can be tedious, especially if the photo detection fails like in this example.
That's why AutoCropper is the best way to scan multiple photos at once. Not only is AutoCropper more accurate, but AutoCropper lets you review the detected images and adjust them appropriately.
AutoCropper is also significantly faster. At the end of this article, I'll have a time comparison.
Total time to scan 3 images with Epson Smart Scan: 1 minute 31 seconds.
Watch this quick video to learn how to scan multiple photos at once and split the scans into separate images using the Epson V600.
Using Apple's ImageCapture software
Another option for scanning multiple photos with the Epson V600 is to use Apple's ImageCapture software. Here's how to do it:
First, download Apple ImageCapture if it is not installed. It should be preinstalled on your Mac, otherwise check your applications folder.
Make sure to install Epson's drivers for ImageCapture before continuing. You can read detailed instructions on installing Epson's ImageCapture drivers on my blog. Without the drivers, you will see a blank screen when your scanner is connected to your computer.
Connect the scanner to your Mac and open the ImageCapture software:
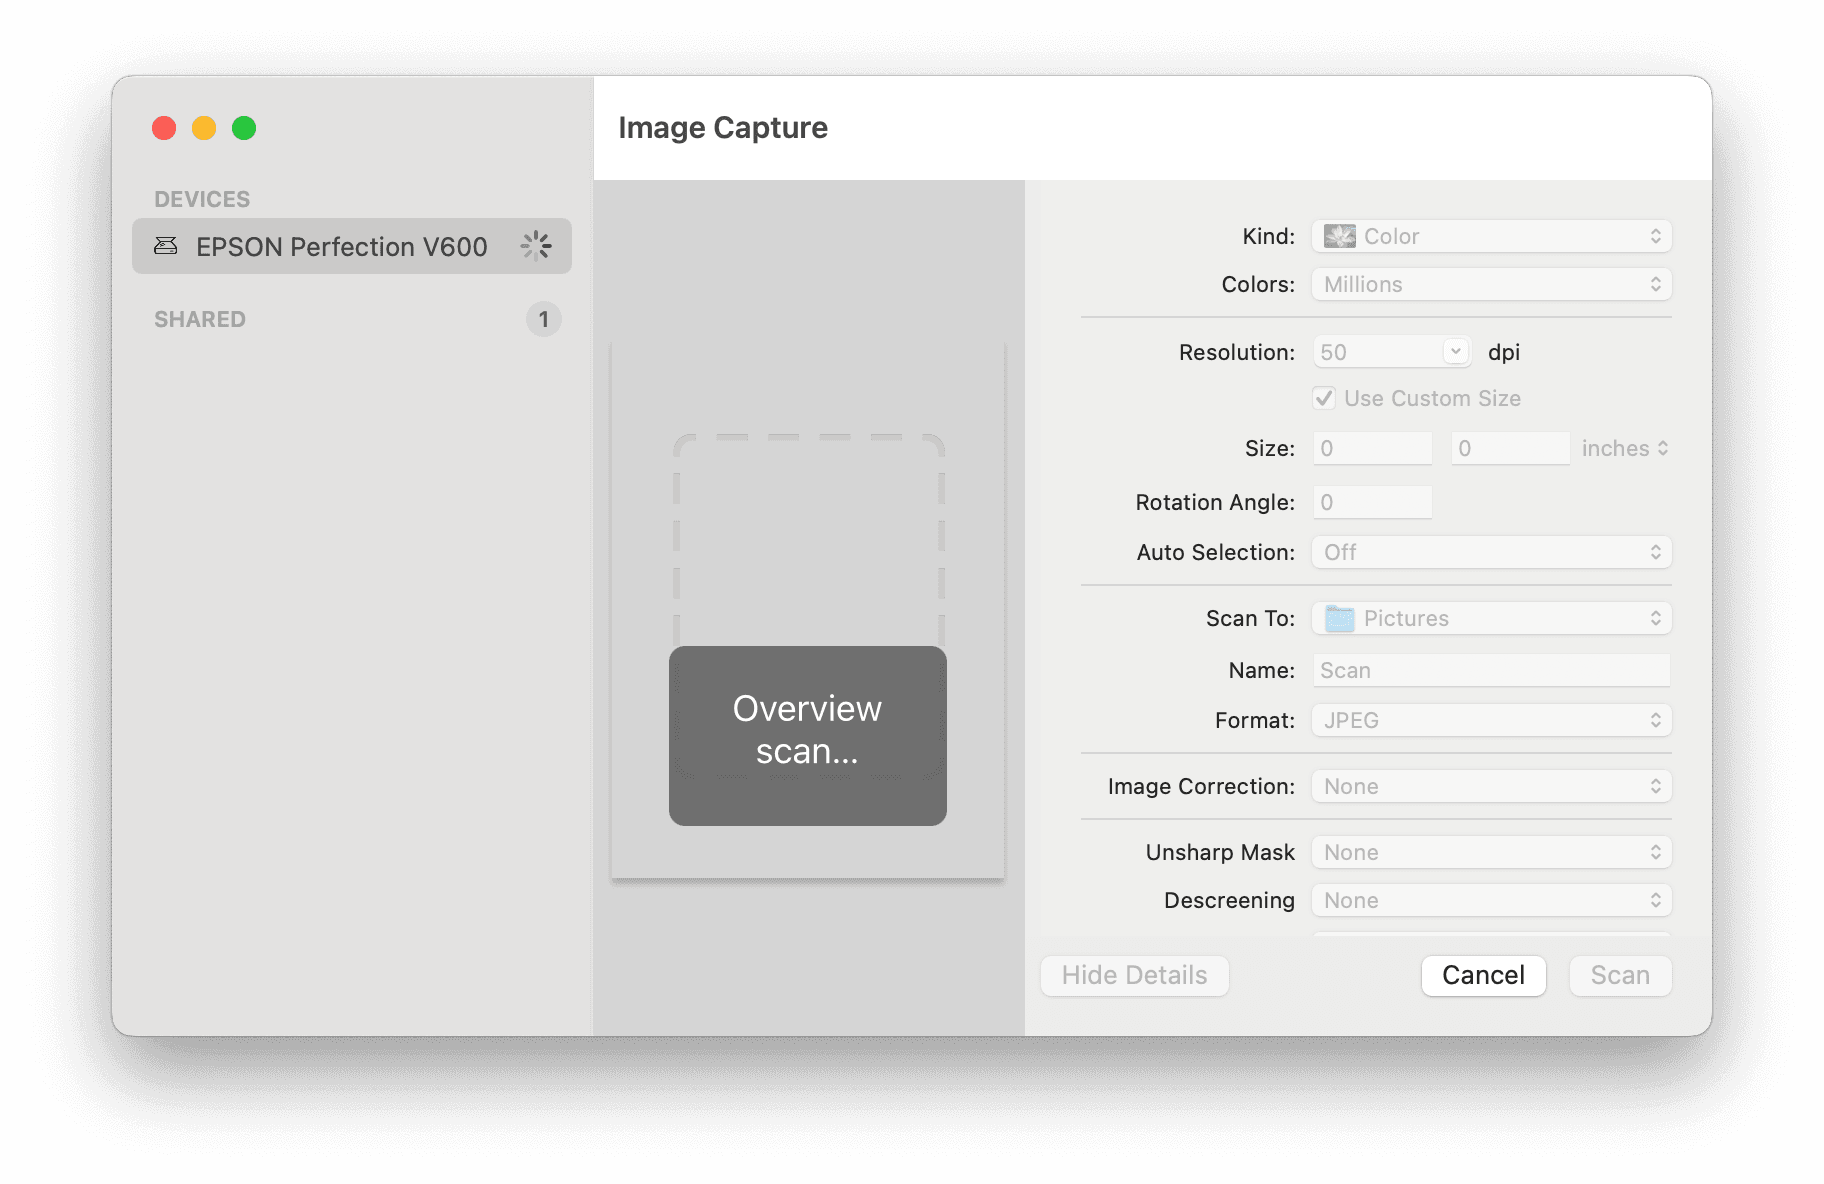
Apple Image Capture scanning application user interface Select the scanner from the list of devices and find the "Auto Selection" feature here:
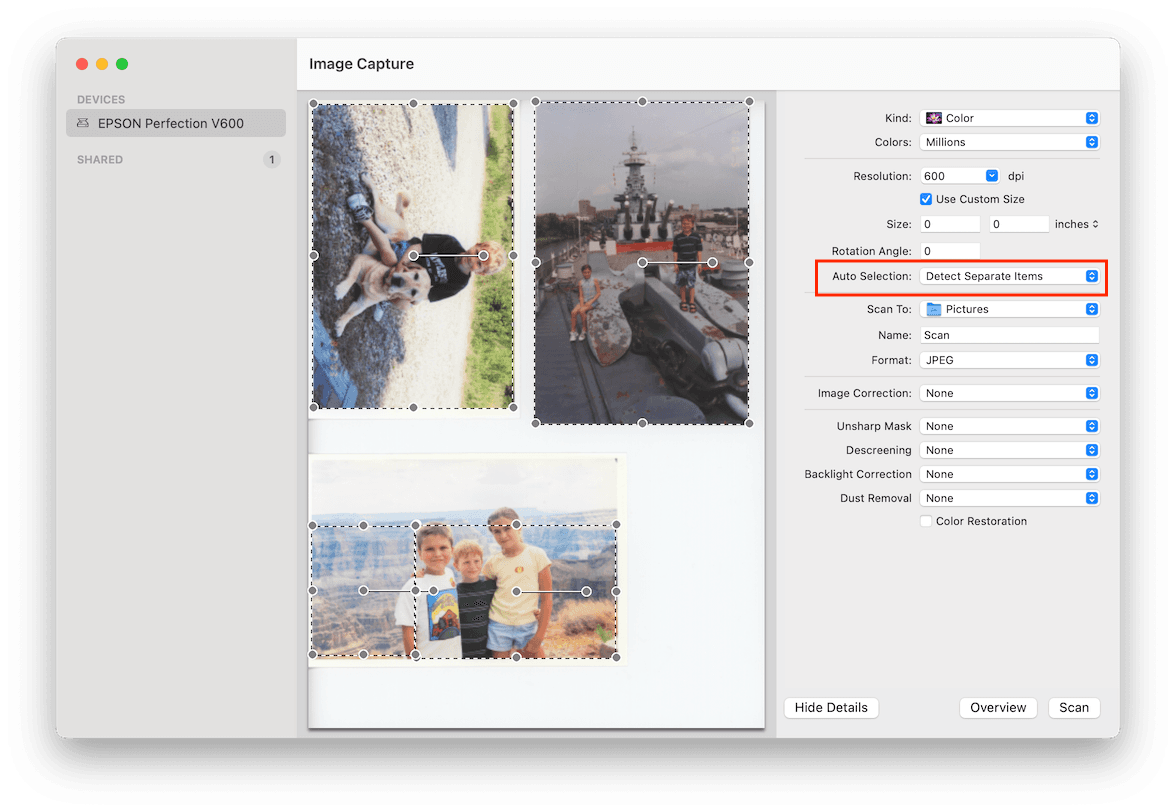
Apple Image Capture scanner connected Choose the "Detect Separate Items" option and place the photos on the scanner bed.
Adjust the scan settings and click "Scan" to begin the process. The scanned images will be saved to separate image files like so:

Apple Image Capture output
You can see that Apple Image Capture is not great at this. It cropped one image into two separate ones, and it also takes very long. Apple Image Capture is slow and inefficient.
Similar to the SmartScan software suite, this method requires manual cropping and saving of individual images.
TOTAL TIME FOR 3 photos: 1 minute 17 seconds. That doesn't include the painful setup and preview scan. Also, it wasn't great at detecting the individual images.
Using AutoCropper to crop multiple images at once
AutoCropper is a photo scanning solution software that offers a faster and more efficient solution to cropping multiple areas of an image at once. AutoCropper is the best way to scan lots of photos.
To use AutoCropper to efficiently crop your images and scans, do not use Apple ImageCapture or Epson's automatic photo splitting. Instead, make a scan of multiple images. Do this for all of your photos. You should have a bunch of image files, each with multiple photos that need to be cropped.
Instead of cropping them manually, upload them to AutoCropper. AutoCropper will detect the individual images and let you review and adjust the detection easily and significantly faster than if you were to use any of the above alternatives. Here's how to use it:
Place as many photos as you can fit on your scanner and scan. Repeat this until you have raw, uncropped scans with multiple photos in each one like this:
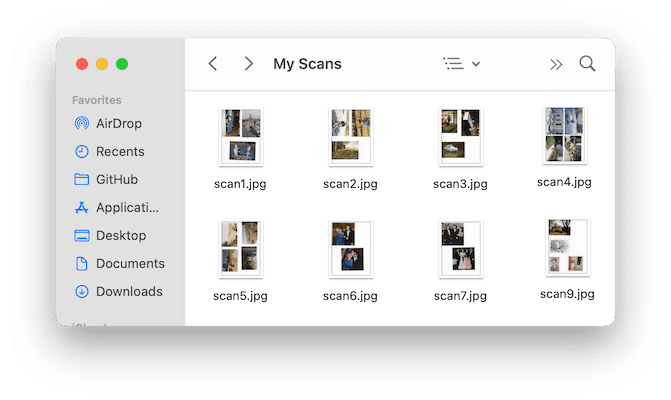
Image files with multiple photos in each image Open AutoCropper and select the image you want to crop:
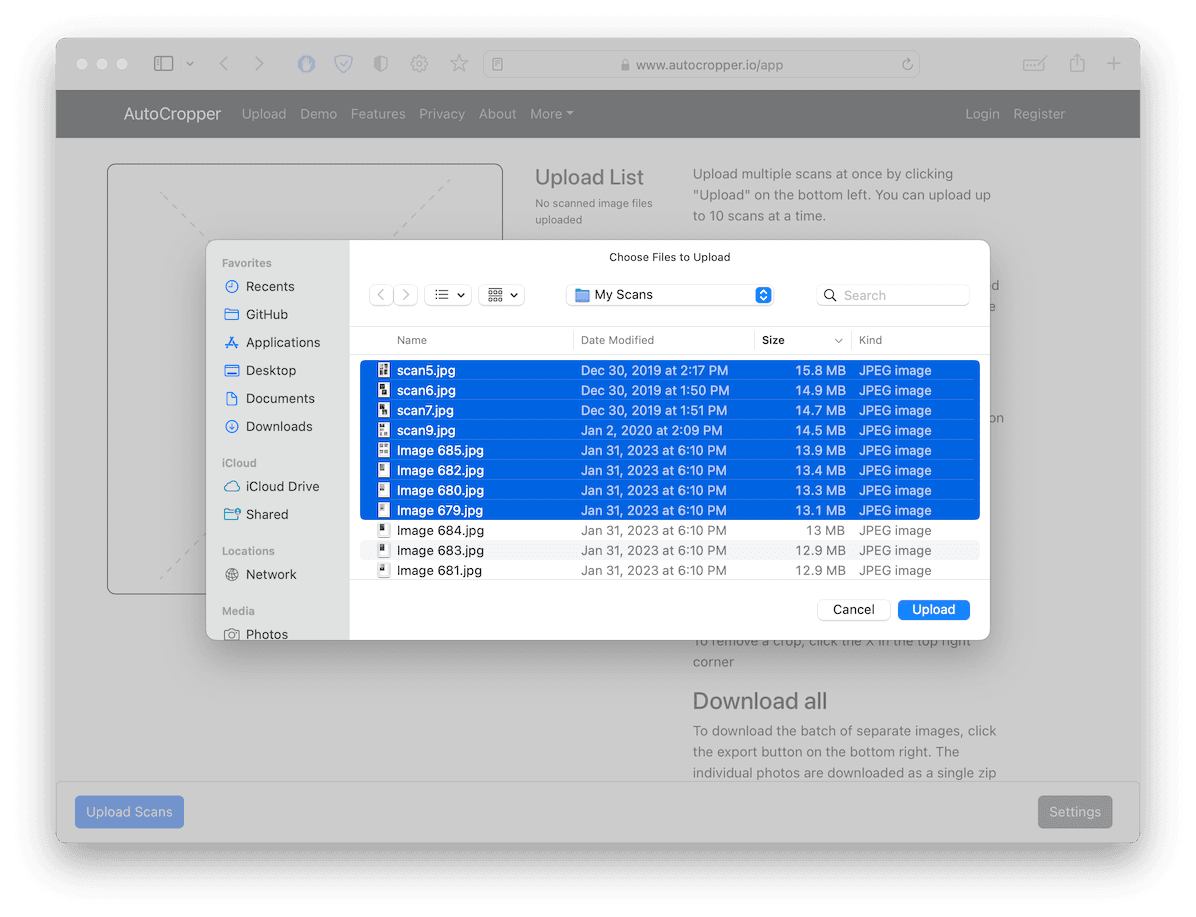
Uploading images to AutoCropper Review the detected images and draw a rectangle around the area you want to crop:
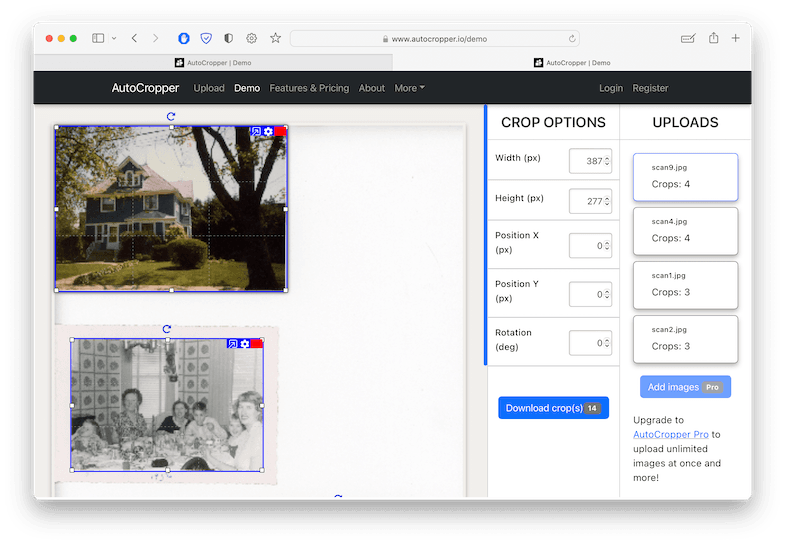
Reviewing the detected individual scans on AutoCropper web application Repeat step 3 for each additional scan you want to crop.
Click "Download Crop(s)" to crop and save all of the areas as individual image files.
AutoCropper's ability to crop multiple areas of an image at once can save you a significant amount of time and effort compared to manual cropping. Additionally, the software offers advanced features such as automatic detection of crop areas and batch processing of multiple images.
In conclusion, cropping multiple areas of an image can be a useful and time-saving technique, especially when scanning multiple photos at once. While traditional scanning software options can be time-consuming and tedious, AutoCropper offers a faster and more efficient solution.