
Are you facing a mountain of old photos waiting to be digitized? Whether you're preserving family memories or organizing your personal archives, scanning hundreds or even thousands of photos can seem like a daunting task. But fear not! I've developed a method that will help you scan photos faster than you ever thought possible. In this guide, I'll share my tried-and-true technique for rapid photo scanning, along with tips for efficient scan splitting and image processing.
Why Speed Matters in Photo Scanning
When you're dealing with a large volume of photos, speed is crucial. The longer the process takes, the more likely you are to get frustrated and give up. My goal is to help you achieve a "factory worker" mindset – a state where you can work on autopilot, maximizing efficiency without sacrificing quality.
The Key to Fast Photo Scanning: Epson ScanSmart
After experimenting with various scanning software options, I've found that Epson ScanSmart is the holy grail for rapid photo scanning. Here's why it's so effective:
No Preview Scan: Unlike many other scanning apps, ScanSmart eliminates the time-consuming preview scan step.
Simple Interface: The app focuses on core functionality, reducing distractions and streamlining the process.
Batch Scanning: You can place multiple photos on the scanner bed and capture them all in one go.
Step-by-Step Guide to Lightning-Fast Photo Scanning
Set Up Your Workstation
Connect your scanner (I use an Epson V600)
Install Epson ScanSmart software
Gather your photos and any cleaning supplies you might need (e.g., microfiber cloth, compressed air)
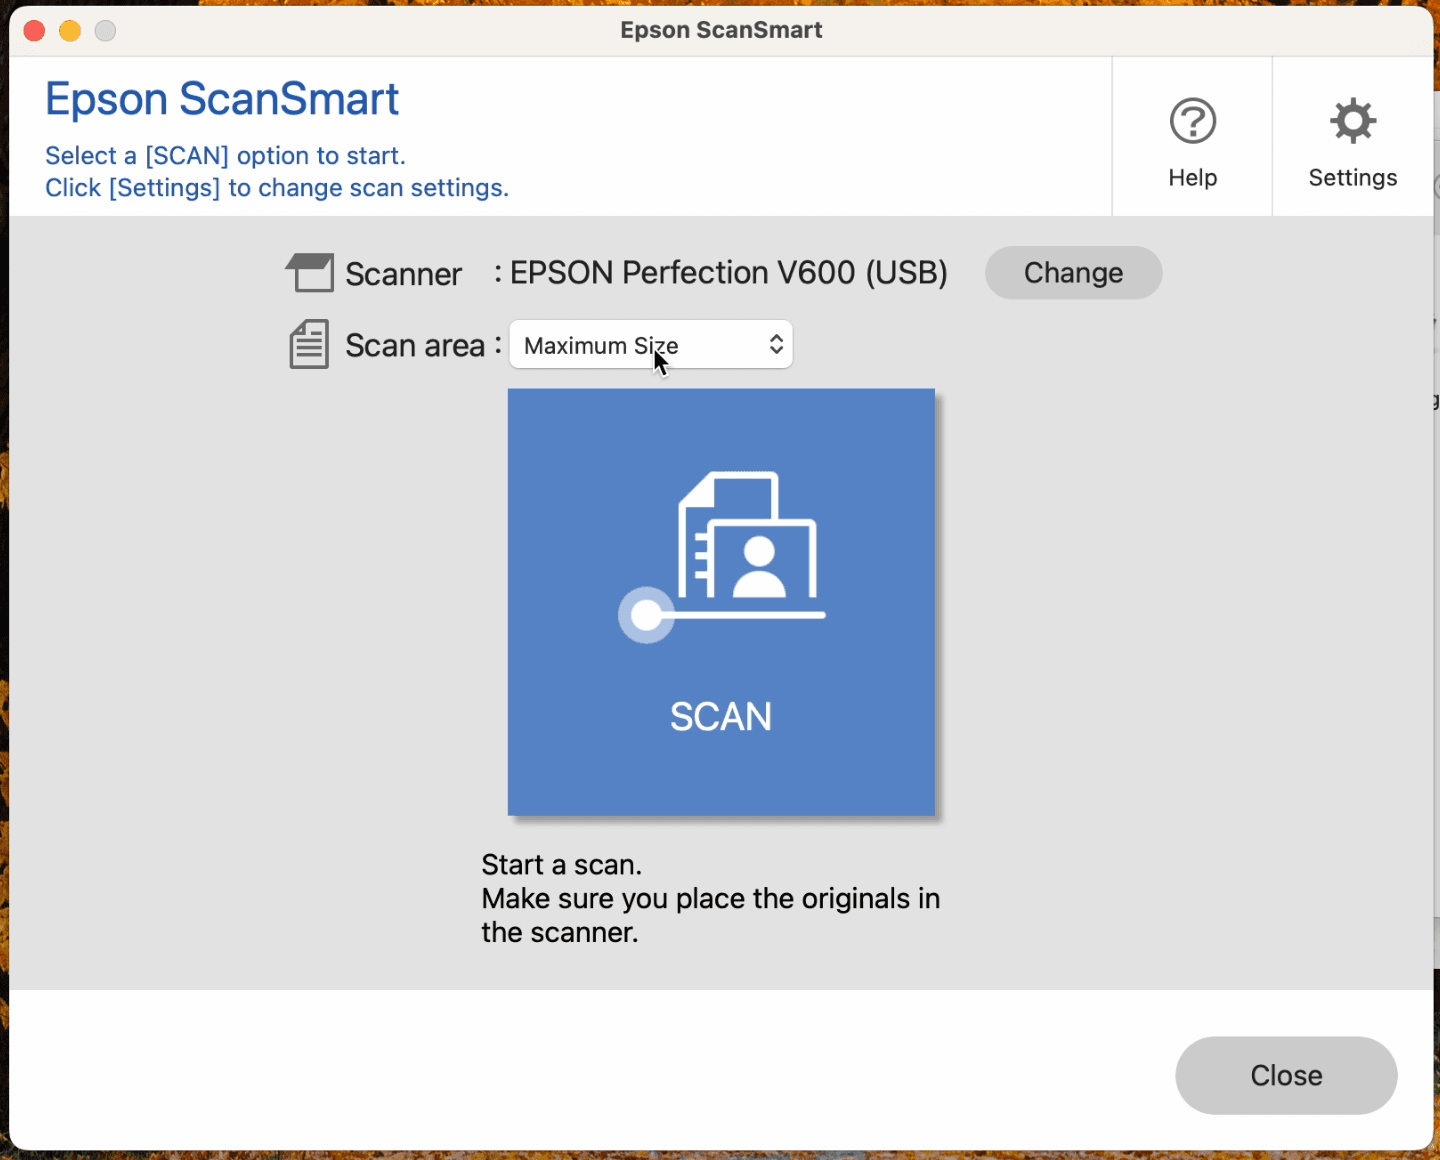
Configure Epson ScanSmart
Open Epson ScanSmart
Set the scan area to maximum size
Uncheck "Skip this screen next time" in the bottom left
Disable auto-cropping (we'll handle this later for better results):
In Settings, ensure you're in "Auto Mode" (this prevents preview scans)
Set JPEG quality to 100 for optimal image preservation
Start Scanning
Place 3-4 photos on the scanner bed, leaving small gaps between them
Click "Scan" and wait for the process to complete (about 10-15 seconds)
While scanning, prepare the next batch of photos
As soon as you hear the scanner finish, open the lid and replace the photos
Press the "Scan" button on the top of Epson ScanSmart:
 Click to expand
Repeat and Rhythm
Aim to get into a steady rhythm of scanning, replacing photos, and initiating the next scan
Don't worry about perfecting the placement – slight imperfections can be fixed later
Batch Processing and Organization
After every 20-30 scans, save your progress (you don't want the program to crash)
Create a folder structure to organize your scans (e.g., by date or event)
Efficiently Split Scans to Separate Images with AutoCropper
Here's a great example GIF of how fast you can scan these images. In this example, I've amassed 38 scans, each with 3 to 4 photos, totaling about 152 individual images in less than 20 minutes:
Splitting the Scans to Separate Images
To quickly split your scanned images into individual photos, I recommend using AutoCropper (full disclosure: I created this tool to solve my own photo scanning challenges). Here's how to use it:
Upload your batch scans to AutoCropper.io
The AI will automatically detect and crop individual photos
Review and make any necessary adjustments
Export the cropped images
Final Organization and Touch-ups
Upload your cropped photos to a cloud service like Google Photos
Use Google Photos' AI to help identify people and organize your images
Take advantage of built-in editing tools for quick enhancements
Tips for Maximizing Your Scanning Efficiency
Don't obsess over perfect quality: Aim for good, consistent results with enough spacing rather than perfection on every scan.
Create a comfortable scanning station: Ensure good lighting and an ergonomic setup to prevent fatigue during long scanning sessions.
Prepare your photos: Remove photos from albums if possible, and gently clean them before scanning.
Scan in batches: Aim for 30-60 minute scanning sessions to maintain focus without burning out.
Use a high-capacity hard drive or cloud storage: You'll be generating a lot of data quickly!
By following this method, I've achieved scanning speeds of nearly 4 photos per minute, including the splitting and organization process. That means you could potentially digitize over 200 photos in just an hour!
Conclusion
With the right tools and techniques, scanning large quantities of photos doesn't have to be a tedious chore. By using Epson ScanSmart for rapid scanning and AutoCropper for efficient scan splitting, you can digitize your entire photo collection in record time. Remember, the goal is to preserve your memories quickly and effectively, so don't get bogged down in perfectionism. Happy scanning!